The Outline
The Outline is where you organize your story into scenes and chapters. Each scene has a title and optional summary in addition to the manuscript text for that scene. Chapters have titles and summaries, but no text. (If you want a single-scene chapter, you still need to add one scene to the chapter).
We want to emphasize that the Outline is an extremely useful tool for discovery writers. Every story has an outline; the chief difference is in whether you design the outline before you write the story, or write the initial outline based on the story you've written! In Fablehenge, it is useful to divide your story up into individual scenes so you can keep track of which characters, settings, objects, and plot points (collectively, we call these tags) are referenced in which scenes.
The outline may look simple, but there are a few neat secrets you need to know about to use it most effectively.
Adding scenes
When your book is first created, it will automatically get a single, empty scene with a default title and empty summary:
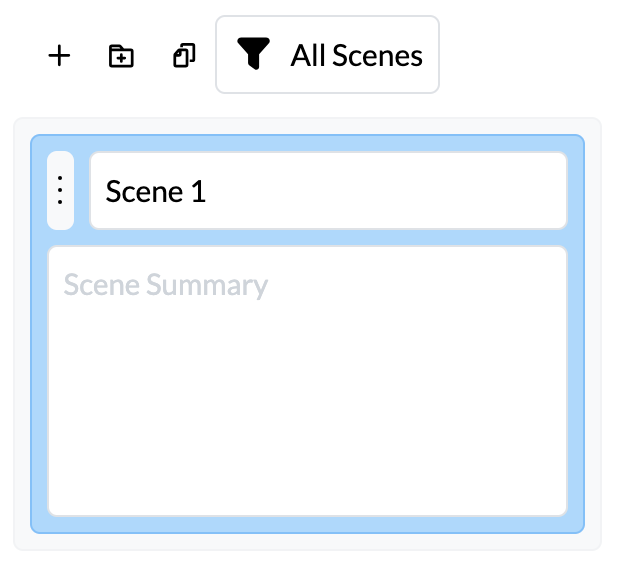
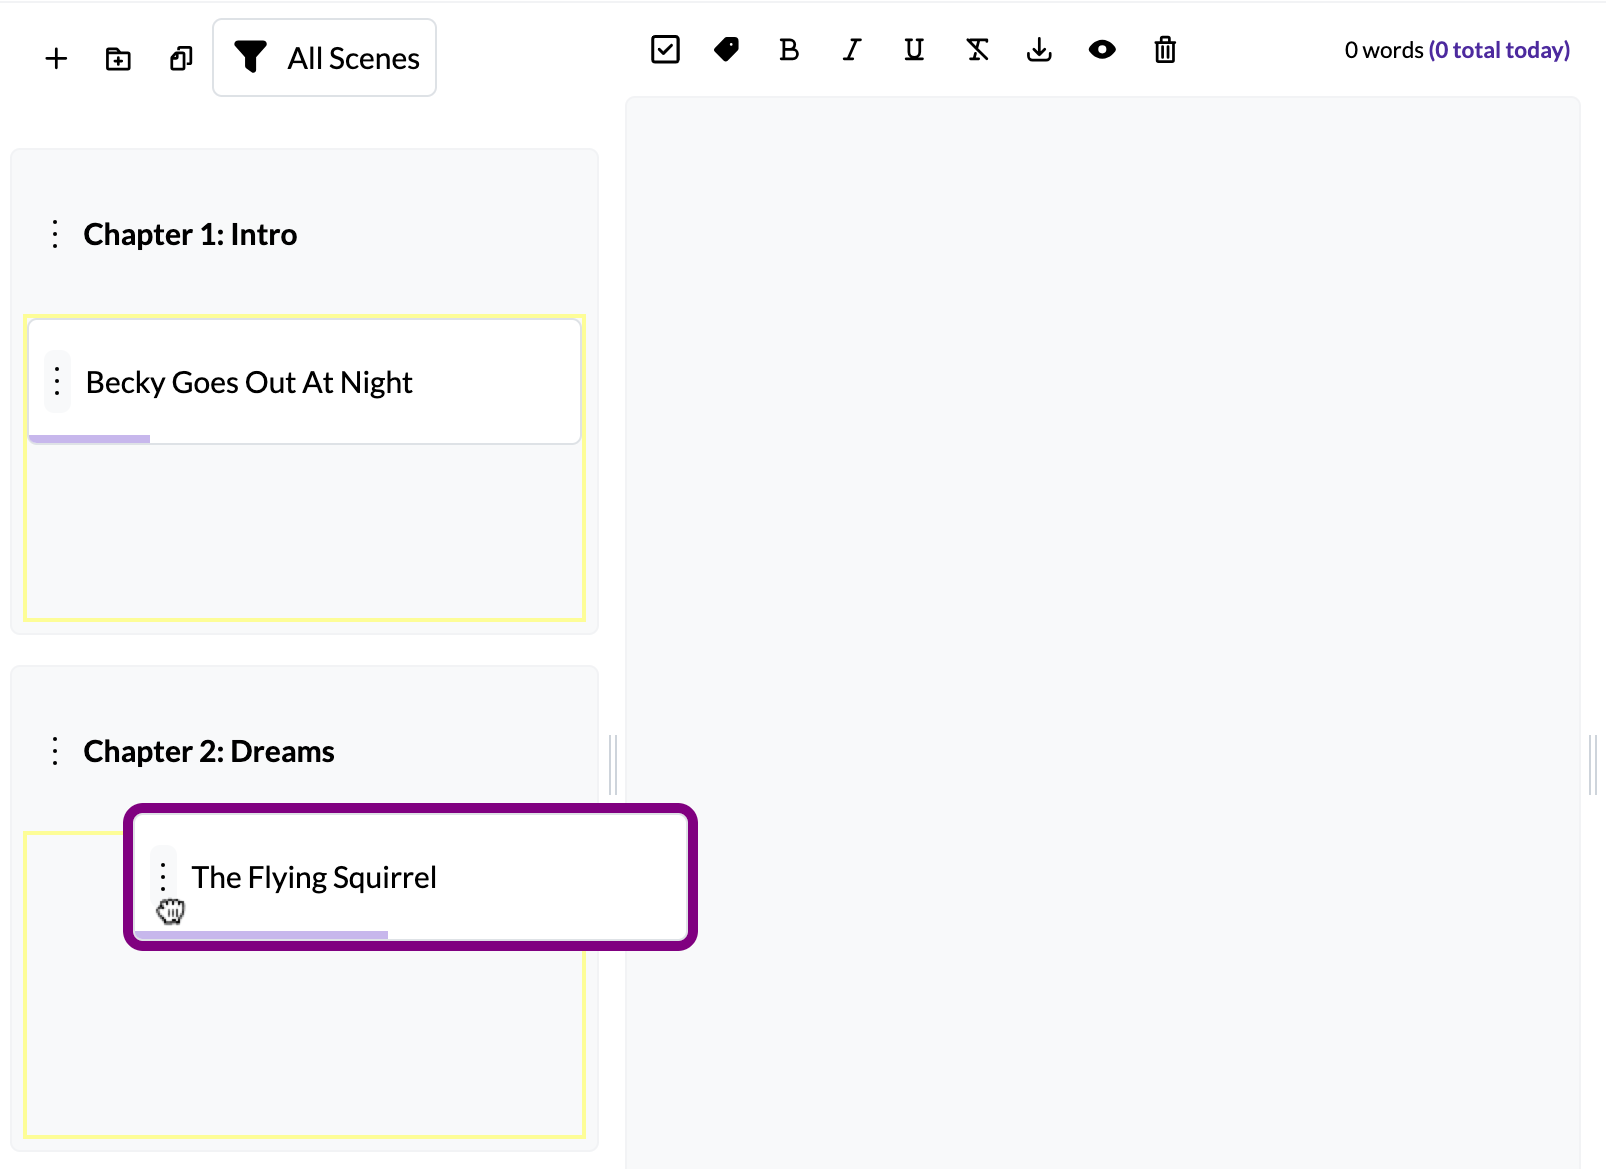
Notice the outline toolbar with four buttons across the top. To add a new scene, click the first of those buttons, the plus sign.

A new scene will show up under the currently selected scene in the outline, and it will become the selected scene:
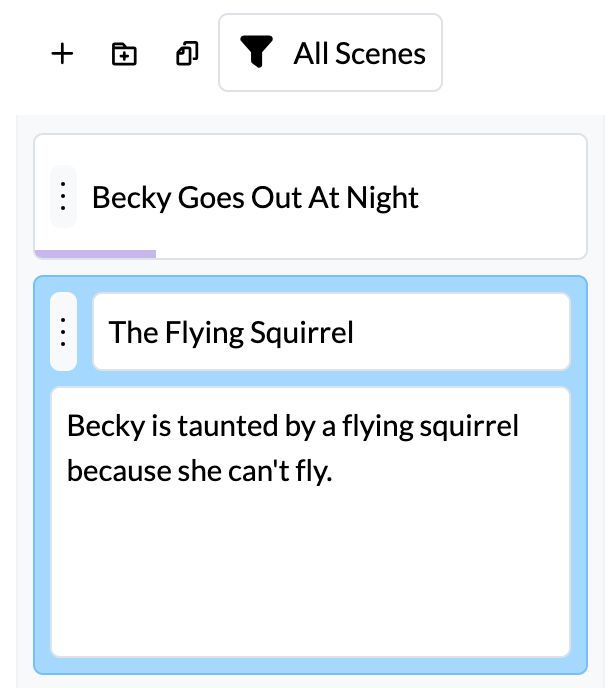
In this image, we can see that the first scene (which I titled "Becky goes Out At night") has been collapsed and has a white background, while the new selected scene (which I've given the title "The Flying Squirrel") is expanded and highlighted in blue.
You can also add new scenes when your keyboard focus is on the title, summary,
or manuscript editor by using the keyboard shortcut Shift+Enter. This can
be particularly handy for outliners who want to churn out a bunch of scene
titles in a hurry.
No matter how many scenes or chapters you add, only one can be selected at a time.
Chapters
Speaking of chapters, you can create one using the second button in the
toolbar: a folder with a small plus in it (![]() )
)

You can also use the
keyboard shortcut Control+Shift+Enter or Command+Shift+Enter to add a new Chapter.
This shortcut works both from the outline title/summary boxes and the manuscript
editor.
If you have a chapter selected when you add a new chapter, the new chapter will be added after the currently selected chapter.
If you have a scene selected when you add a chapter, all the scenes between the selected scene and the end of the chapter will be moved into the new chapter. You can use this feature to quickly split a chapter into two separate chapters.
The following outline has two chapters in it. Chapters have a grey background and are containers for scenes.
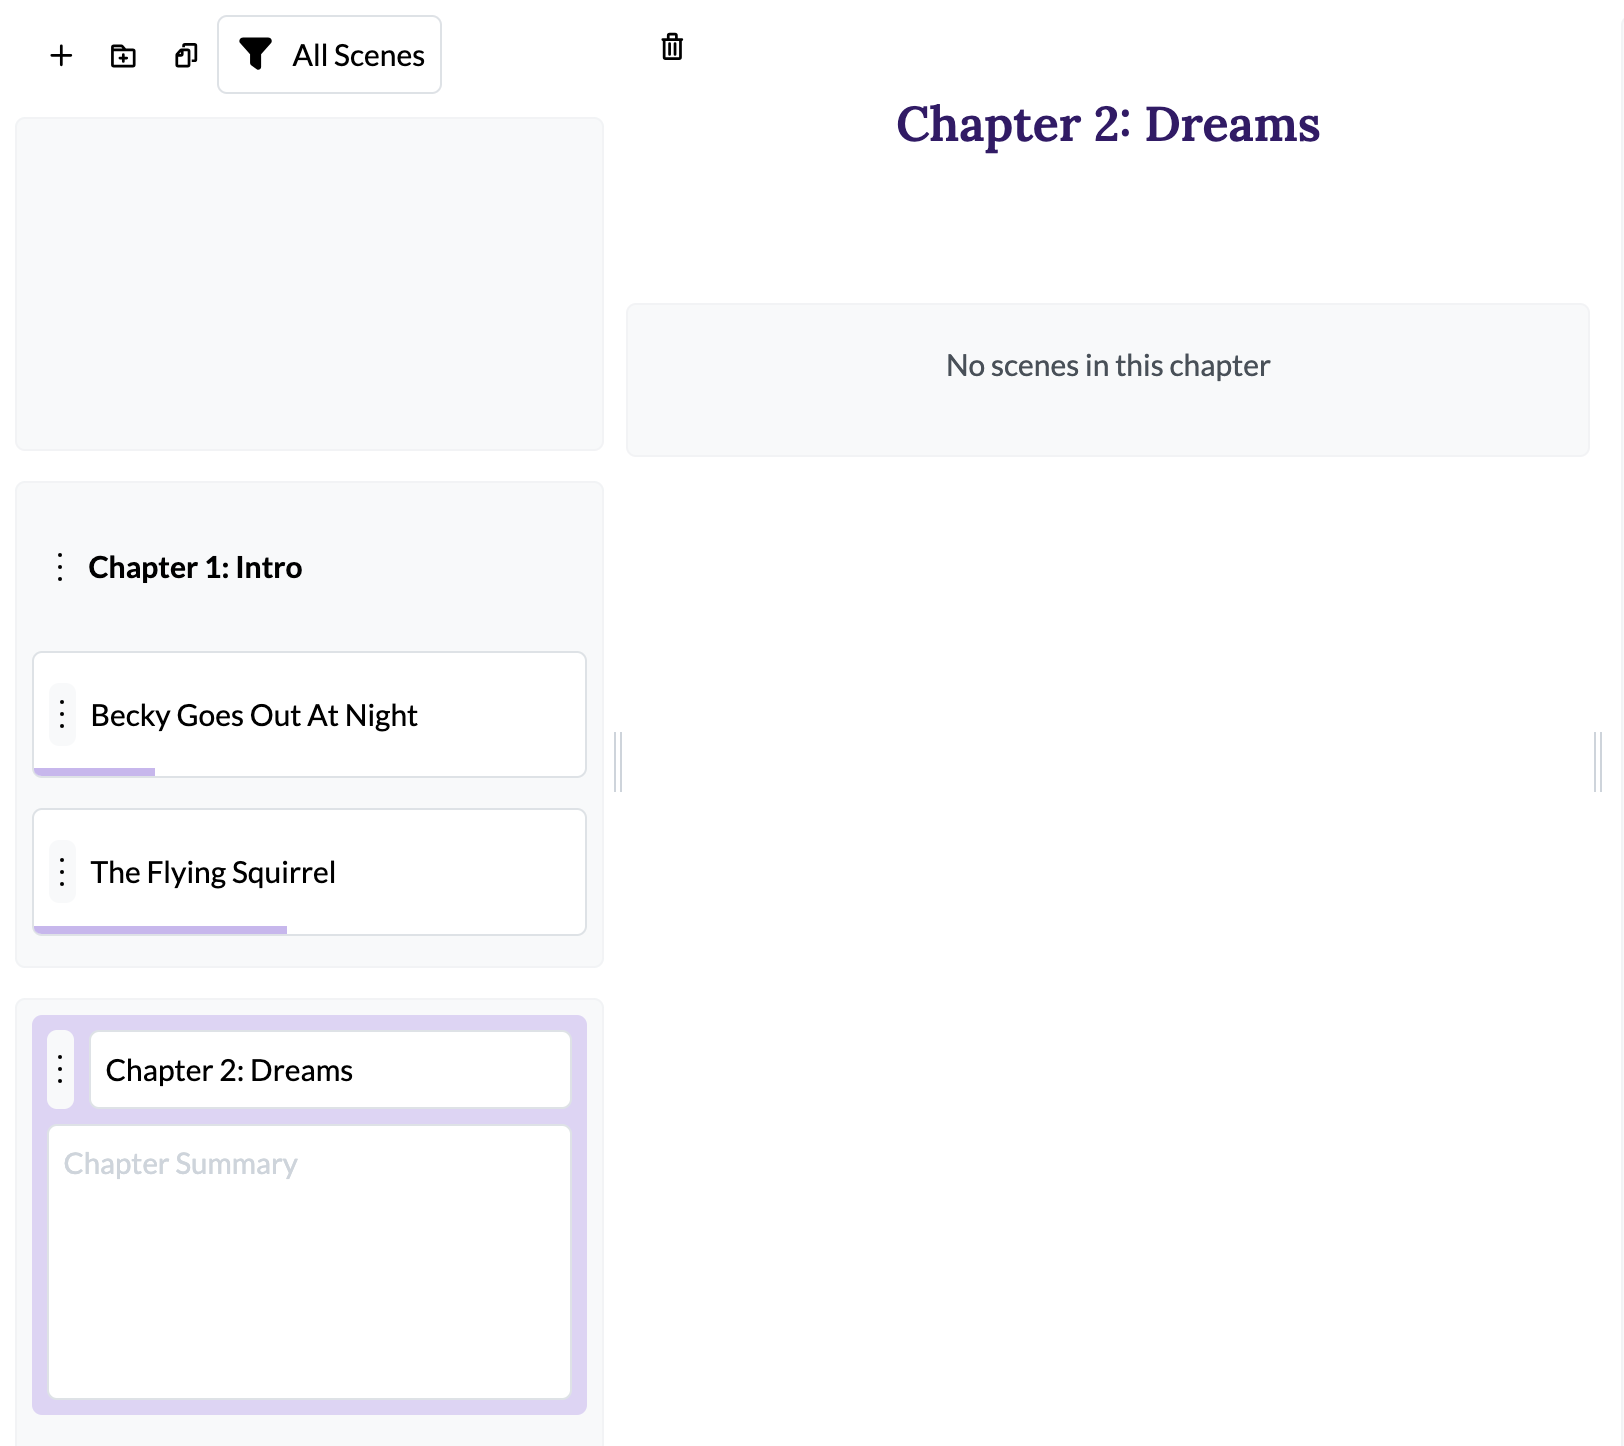
There's actually a fair bit to understand in this simple screenshot! I have placed two scenes in Chapter 1; the text in those scenes will represent the chapter contents.
Chapter 2 doesn't have any scenes in it, but it is currently selected so I can edit the chapter title and summary.
Above Chapter 1, there is a (currently empty) box where I can place scenes that are not assigned to chapters yet. If you like to discovery write your book before splitting it into chapters, you might place dozens of scenes in this box before you create a chapter. Alternatively, you can use it to hold secret scenes or deleted content that you don't want to discard. The box is there for you to use as you see fit.
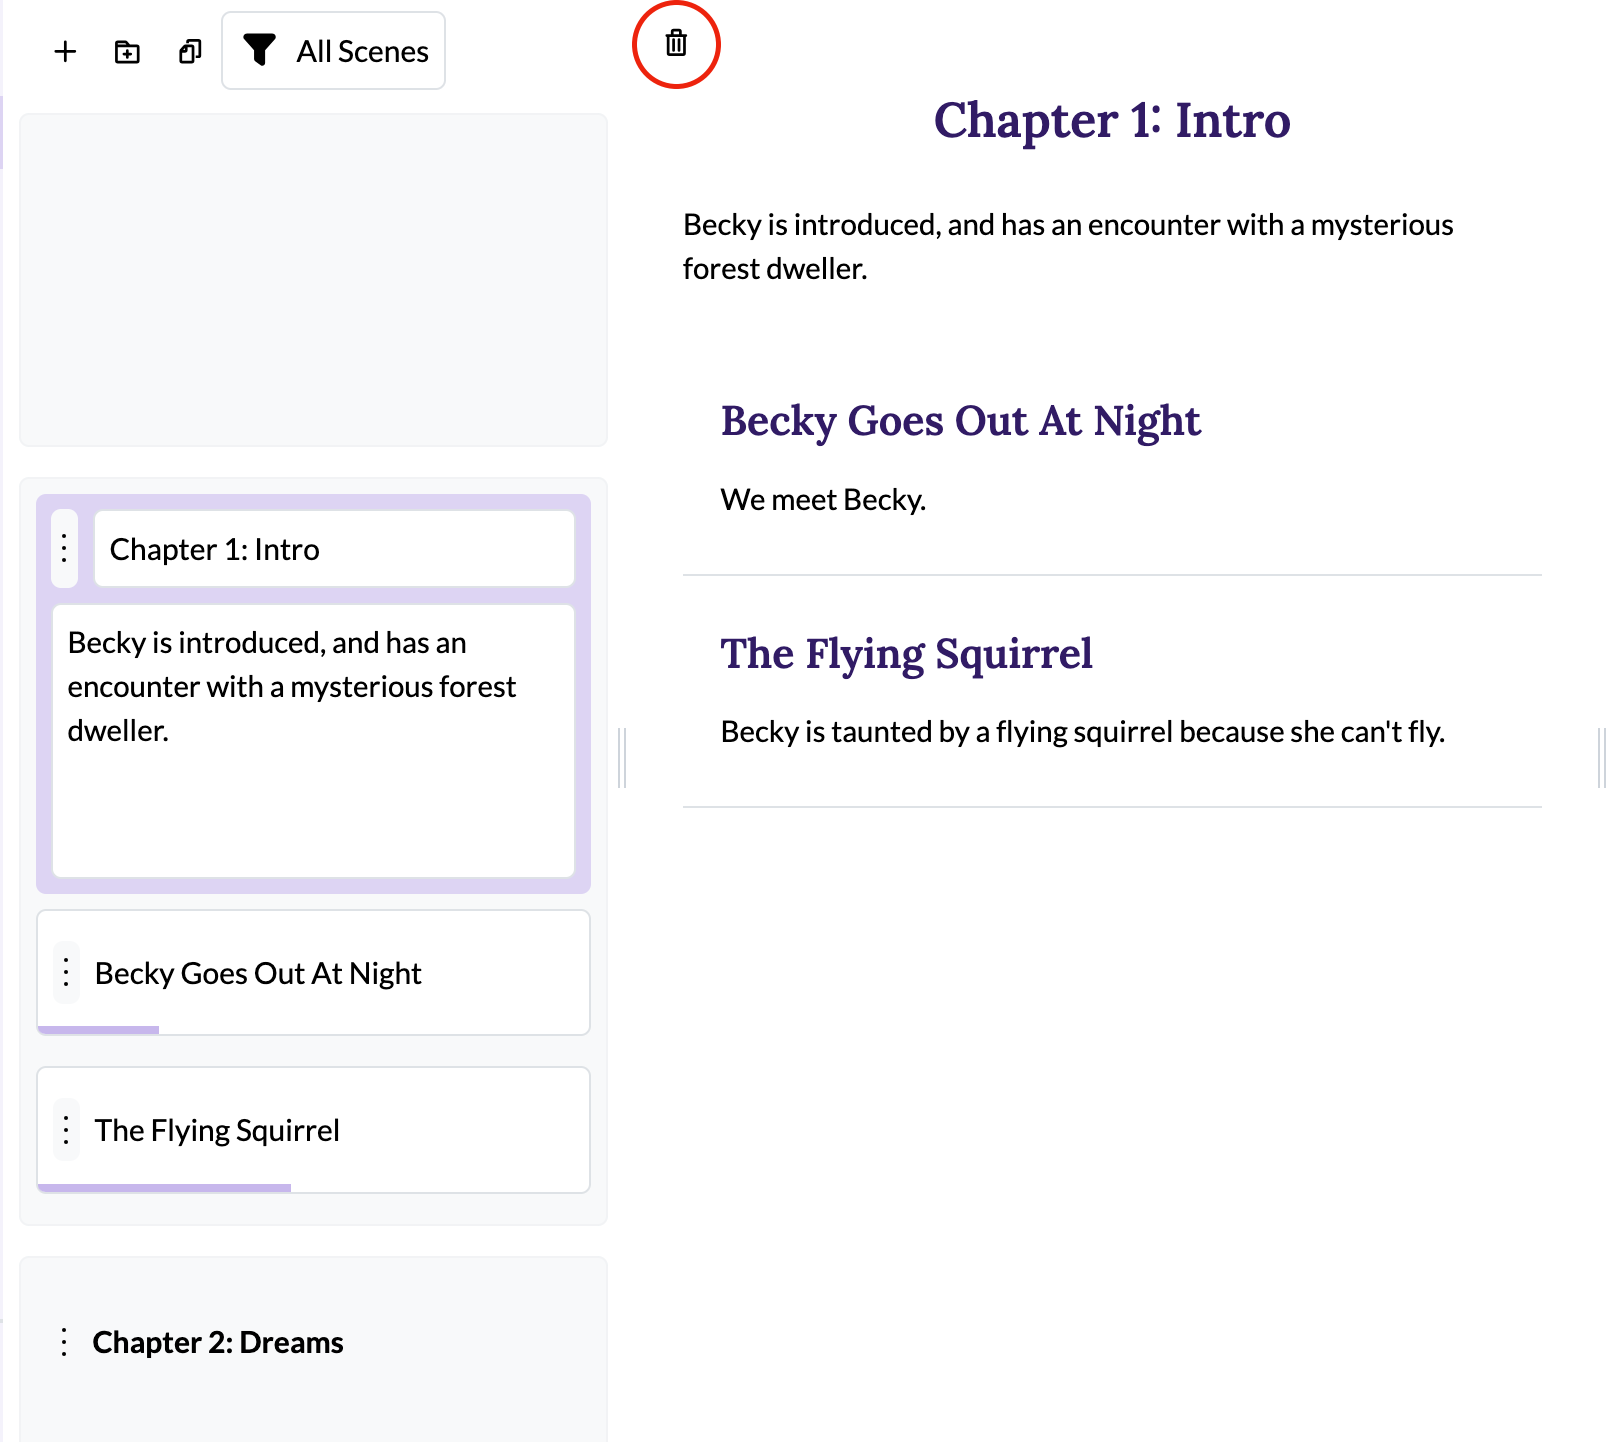
When a chapter is selected, the manuscript column in the middle does not contain editable text. Instead, it shows a summary of the scenes in that chapter.
Chapters don't have editable text. Other than editing the title and summary, the only useful thing you can currently do with a chapter is delete it. Use the Trash icon in the chapter's manuscript toolbar (not the outline toolbar) to do so.
Note that when you trash a chapter, the scenes in the chapter are not deleted, and are instead added to the previous chapter. You can mark them as secret or delete them individually if you prefer.
Reordering
You can reorder scenes and chapters using drag and drop. Each scene and chapter has a small drag handle (with three dots in it) at the left side. Click and drag that handle to move the scene or chapter between existing ones.
If you drag a chapter, all of its scenes will be dragged with it, and you can only drop it between other chapters.
You can also reorder scenes with the keyboard. To simulate a drag and drop with
keyboard you'll need to use the tab or shift+tap key to navigate focus to
the drag handle for a specific scene. Then press either space or enter to
start the reordering sequence and use the arrow keys to move the scene up or
down. Press Enter to confirm the new position, or Escape to cancel
keyboard-based reordering.
Splitting Scenes (for discovery writers)
If you're a discovery writer, also known as a pantser, you might think you don't have much use for an outline. In truth, I'm (this is Dusty, BTW. Hello!) largely a discovery writer. I do a bit of outlining for the major plot sequences and then pants everything together. So while Fablehenge supports outliners, it was actually designed for discovery writing.
The truth is, every book has an outline, regardless of how you write it. The main difference is that discovery writers "discover" the outline as they write the book, or after the first draft is complete. A discovery-written novel is (probably) not a good story until it has gone through extensive revision to ensure continuity and pacing are maintained.
So, as a discovery writer, yes, you will use the outline, you'll just use it later. Personally, I can often "feel" when a discovery written scene has come to an end and I create a new one at that time. However, sometimes upon rereading, I'll discover that a long sequence of text is actually multiple scenes.
That's what the Split scene button on the manuscript toolbar is for. It
looks like a little arrow pointing
down:

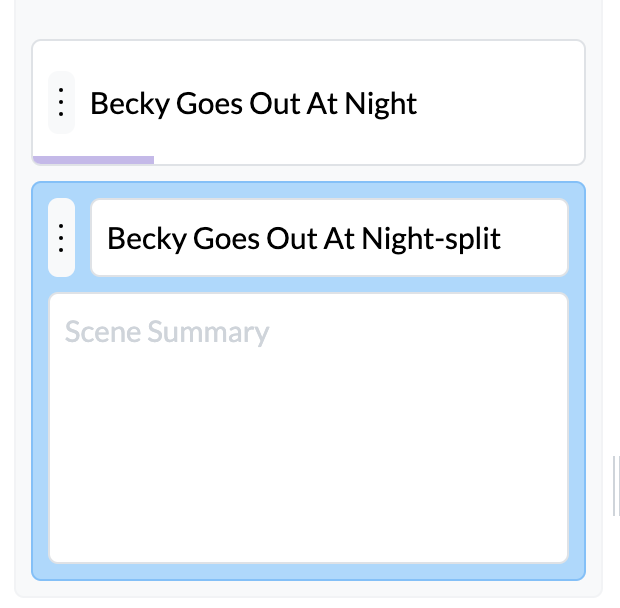
When you click this button or use the keyboard shortcut Command+Enter or
Control+Enter, Fablehenge will create a new scene where everything before
the current cursor position stays in the current scene, and everything after
goes into the new scene. You'll probably want to edit the title of the new
scene, as the default will be "<old scene title>-split":
Duplicating Scenes
Sometimes you want to make a copy of a scene, perhaps because you are unsure which direction you want to take a story and want to experiment with a different version of it without going to the trouble of maintaining an entirely separate draft of the book.
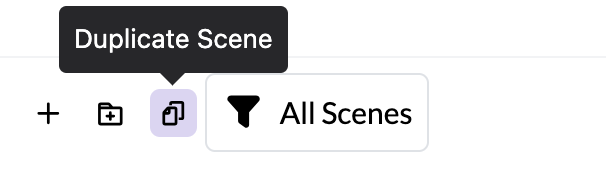
The duplicate scene button is the third button in the outline toolbar. It is the traditional "copy" icon:
 .
.
When you click it, a copy of your scene will be created directly blow the current scene and you can edit the two copies independently. You may want to mark it as secret (as described below) to distinguish between the two versions.
Keyboard Shortcuts
If you think of yourself as more of an outliner or plotter, you'll probably
spend a lot of time in the outline view before you start drafting your
manuscript. In order to make outlining quick and simple, we added a keyboard
shortcut to create a new scene so you don't have to move your hands to the
mouse every time you want to create a scene. Instead, you can type the title of
your new scene, optionally use the tab key to jump to the summary and write
the summary, and then press Shift+Enter (or Shift+Return) to insert a new
scene immediately after the current one.
This keyboard shortcut also works for discovery writers! If you use
Shift+Enter while editing a manuscript page, it will create a new scene below
the current one without breaking your flow to grab the mouse. If you instead
use Shift+Control+Enter (or Shift+Command+Enter on a Mac), it will create a
chapter, and Control+Enter or Command+Enter will do the same thing as
clicking the split scene button that we discussed above.
Secret Scenes
You can mark any scene as "secret" by clicking the "eye" icon in the manuscript toolbar:
 .
.
You can also mark a scene as secret from either the manuscript or outline
view using the keyboard shortcut Control+h. Note that Command+h will not
work as that is the MacOS keybinding to hide the window.
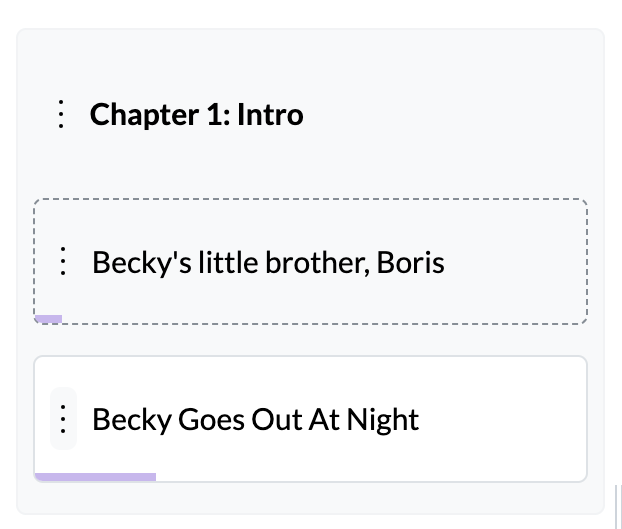
In this outline, I've added a new scene titled "Becky's little brother, Boris". It's about how Boris is a pretty annoying little brother and Becky really just wants to escape his pestering her with questions about nuts. The scene has a grey background and dashed border to indicate that it is a secret scene.
Secret scenes are not included with the export of your novel. They are handy for storing some worldbuilding content that you don't intend to show up in the published novel (for example, a side character's backstory). They are also useful for recording "deleted scenes"; scenes that you originally thought should go in the novel, but upon revision discovered they didn't quite flow with your desired pacing. Rather than deleting those scenes altogether, you can mark them as secret for later reference.
If you end up with a lot of secret scenes in your project, they can become rather distracting. Luckily, there are several filtering modes on the outline.
Filtering and Searching the Outline
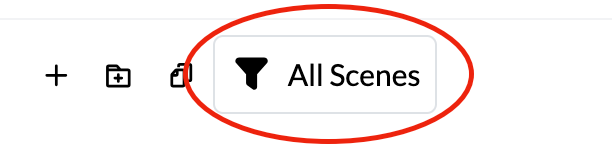
The outline toolbar contains a button with a little funnel symbol and the words "All Scenes" beside it:
If you click this button, you can see a dropdown outlining the various filter options:
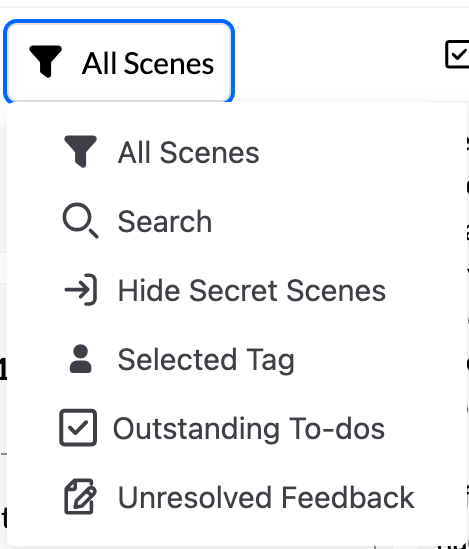
Selecting anything besides All Scenes will filter your outline so that only
scenes that match a specific criterion are shown.
For example, if you click Hide Secret, the outline will not show the scene we
just marked as secret. Don't worry, it hasn't been deleted! Just switch it back
to "All Scenes" to get it back.
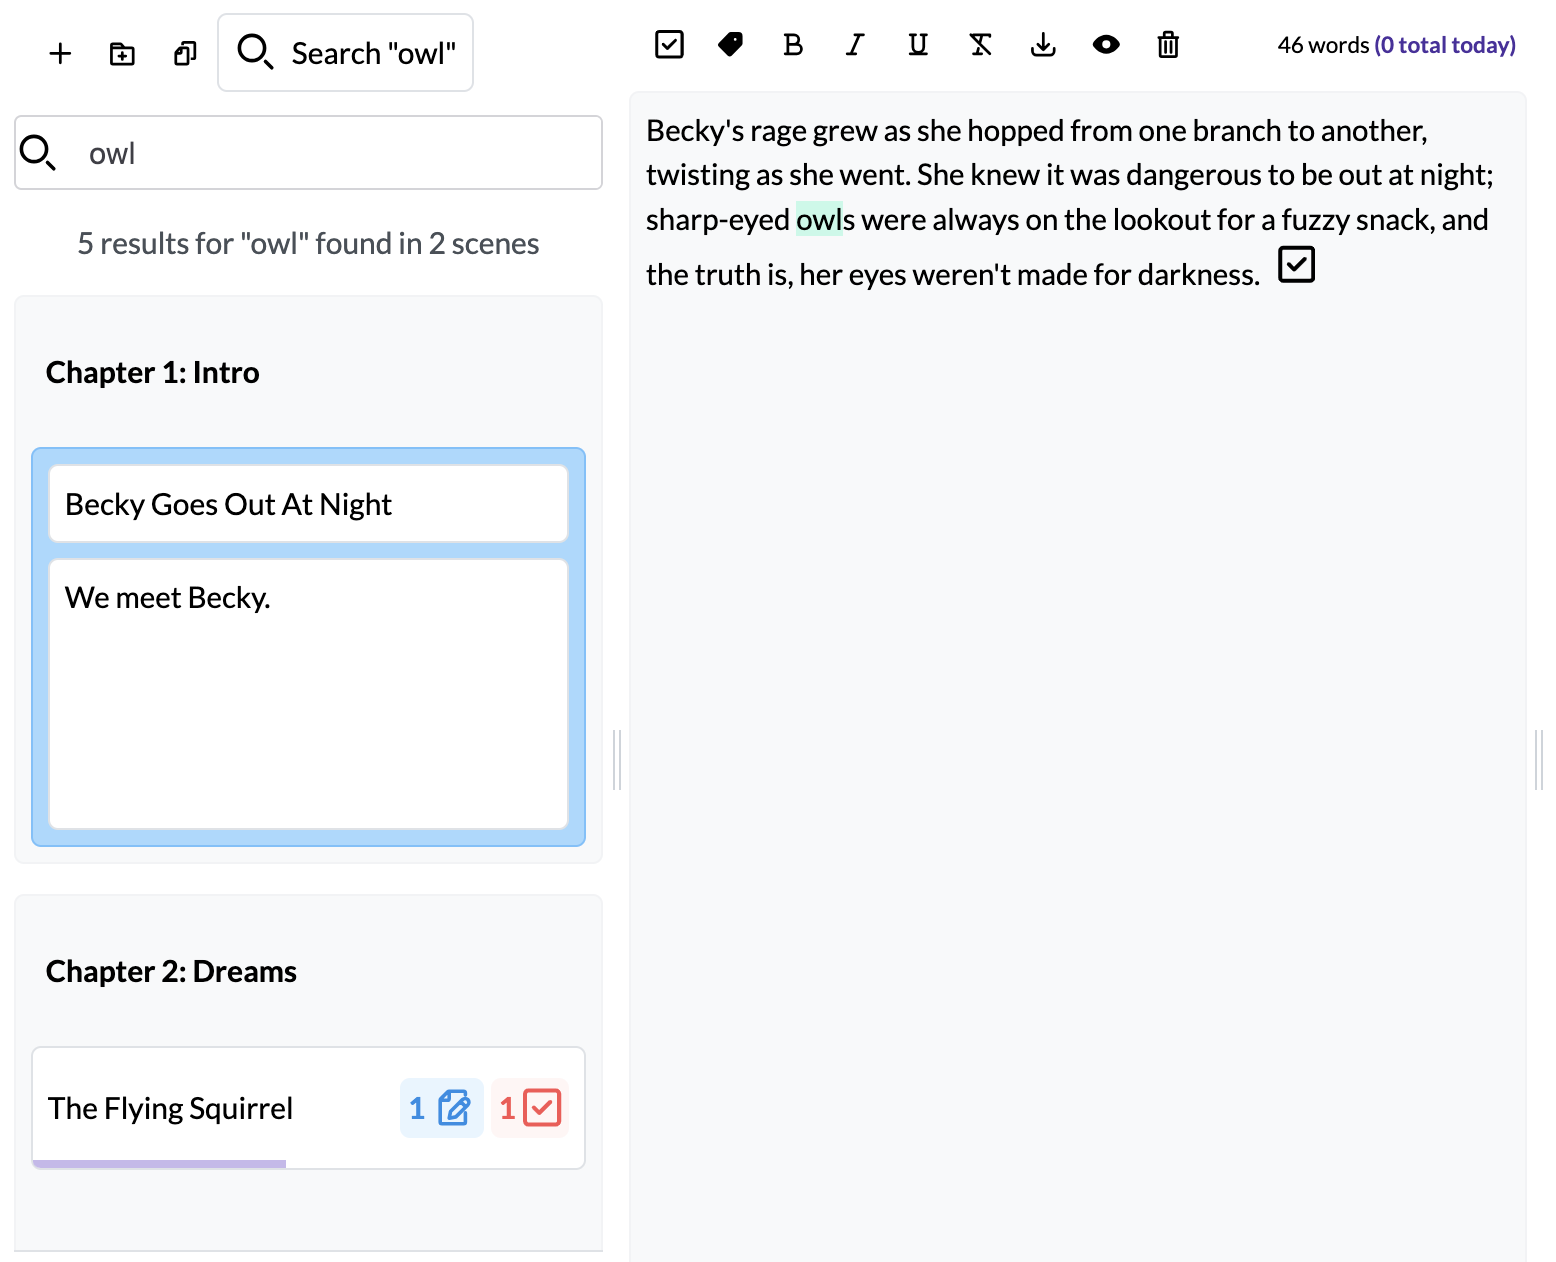
The Search filter allows you to search your manuscript for a specific word
or phrase. Simply type your search term into the "Search" box, and the outline
will only show scenes that contain that term. The searched term will also be
highlighted in the scene text.
We'll discuss the Selected Tag, Outstanding To-dos, and Unresolved Feedback filtering modes later, though you can hopefully intuit what kind of filtering they will do.
Deleting scenes and chapters
The trash icon on the manuscript toolbar can be used to delete the currently selected scene or chapter.

If you delete a chapter, the scenes in that chapter will be preserved; only the chapter marker will be removed.
If you delete a scene, all its text will be forever lost. If you are at all uncertain about whether to delete a scene, use the "secret scene" functionality instead to mark it as secret.
Because deleting scenes is a destructive operation that can result in loss, we show you a confirmation dialog before deleting so you don't have to worry about accidentally clicking the toolbar icon.
Index Card View
Fablehenge also includes an index card view that gives you more of an overview of your outline items. To access it, you need to do two things:
- Ensure that filtering is set to
All Scenes - Drag the outline drag handle far enough to the right to automatically switch view modes
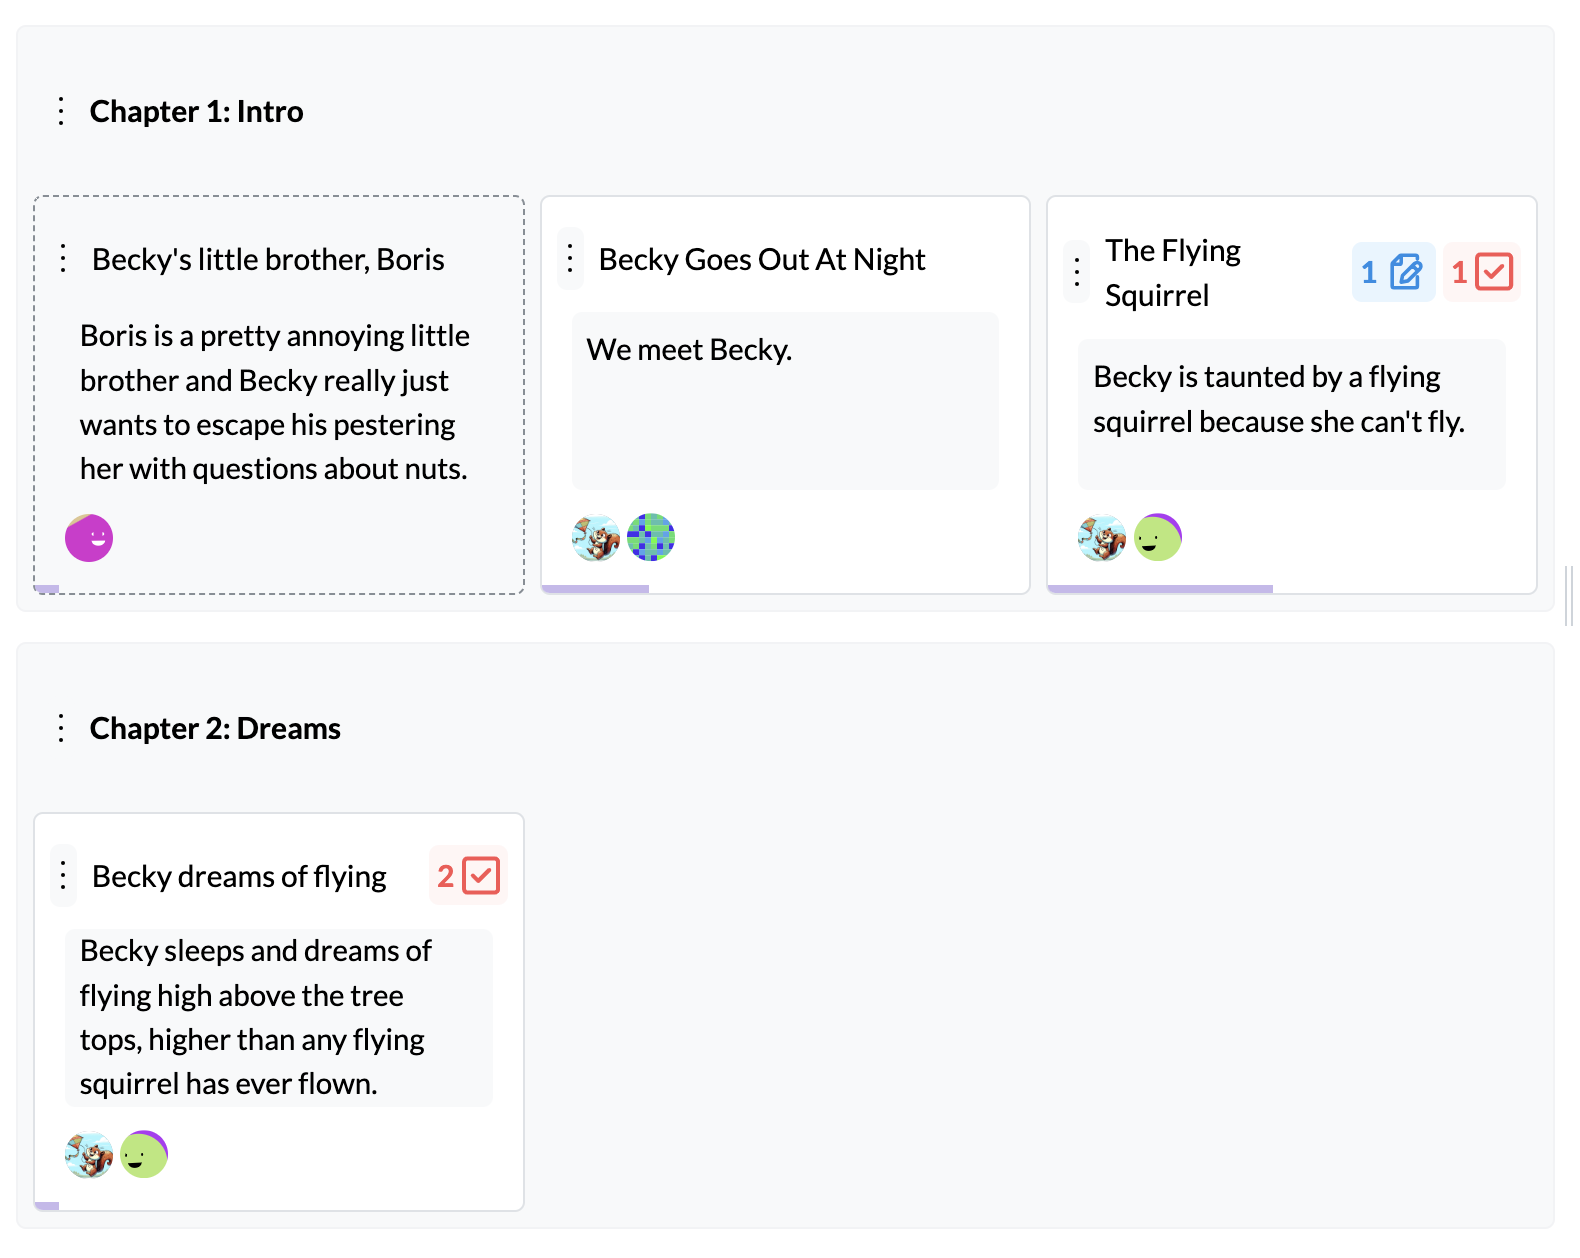
When in card view, you can see the summary of every scene in addition to the title. You can also drag scenes around if you are still planning your outline.
We haven't discussed tags or to-dos yet, but index card view helpfully shows avatars associated with tags attached to a given scene as well as any outstanding todos or feedback.
Word count indicator
The small bar along the bottom of each scene in the outline is a visual indicator of how many words are in the scene. You can hover your mouse over the bar to see exactly how many words it contains:
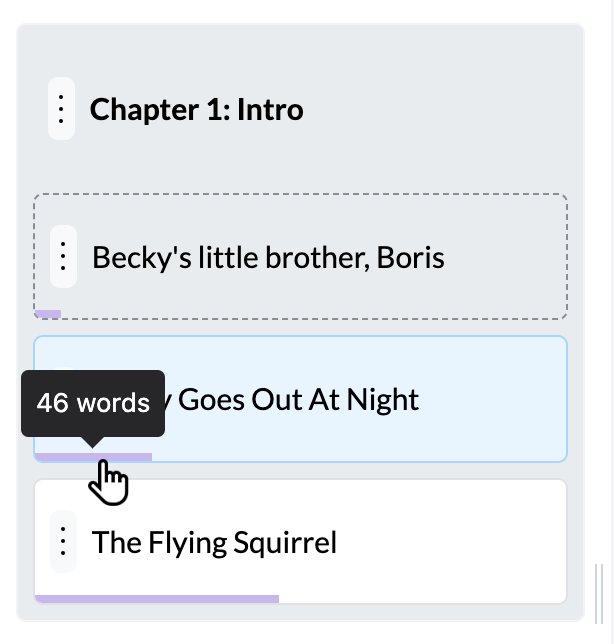
The length of the bar corresponds to the length of the scene. This one shows that the current scene has 46 words in it. You can tell that the scene about the flying squirrel has quite a few more words, as the bar is longer. This can be confirmed by hovering the mouse over it:
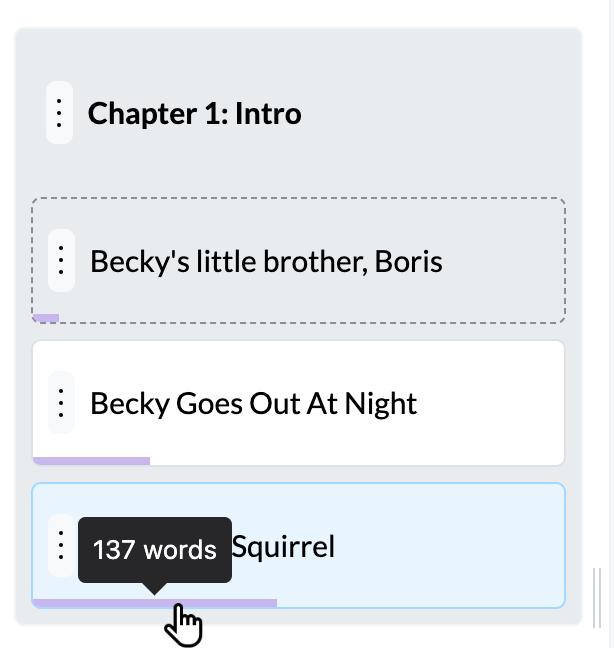
This is helpful to get a quick at-a-glance idea of how much progress you've made on each scene, and which scenes you haven't started yet.