Timeline
Timelines show which tags appear in which scenes, helping you visualize how multiple tags relate to your story at the same time.
To build a timeline, select a tag to see a sequential list of all scenes in which that tag appears. Select multiple tags to see a side-by-side overview of how each tag's timeline relates to others.
You can select any number of tags to include in a timeline, and create as many timelines as you like. Here are just a few ideas about how to use timelines:
- Keeping track of which subplots happen in which scenes.
- Visualizing which characters appear together throughout the story.
- Seeing the progress from one setting to the next as the story proceeds.
- Ensuring continuity so characters or objects don’t suddenly appear in scenes they couldn’t have transported to.
- Double checking whether you have tagged certain story elements in all the relevant scenes.
- Visualizing a beat chart for your story.
Timelines are integrated with your manuscript. If you've already added tags to scenes while writing, each tag's column will be automatically pre-populated with all of its scenes as soon as you add the tag to the timeline.
You can also use the timeline to edit tags in scenes. Clicking the cell at the intersection of a tag name and scene title will add the tag to the scene. If you like, you can use the timeline to tag all your scenes before writing any text.
Creating a timeline
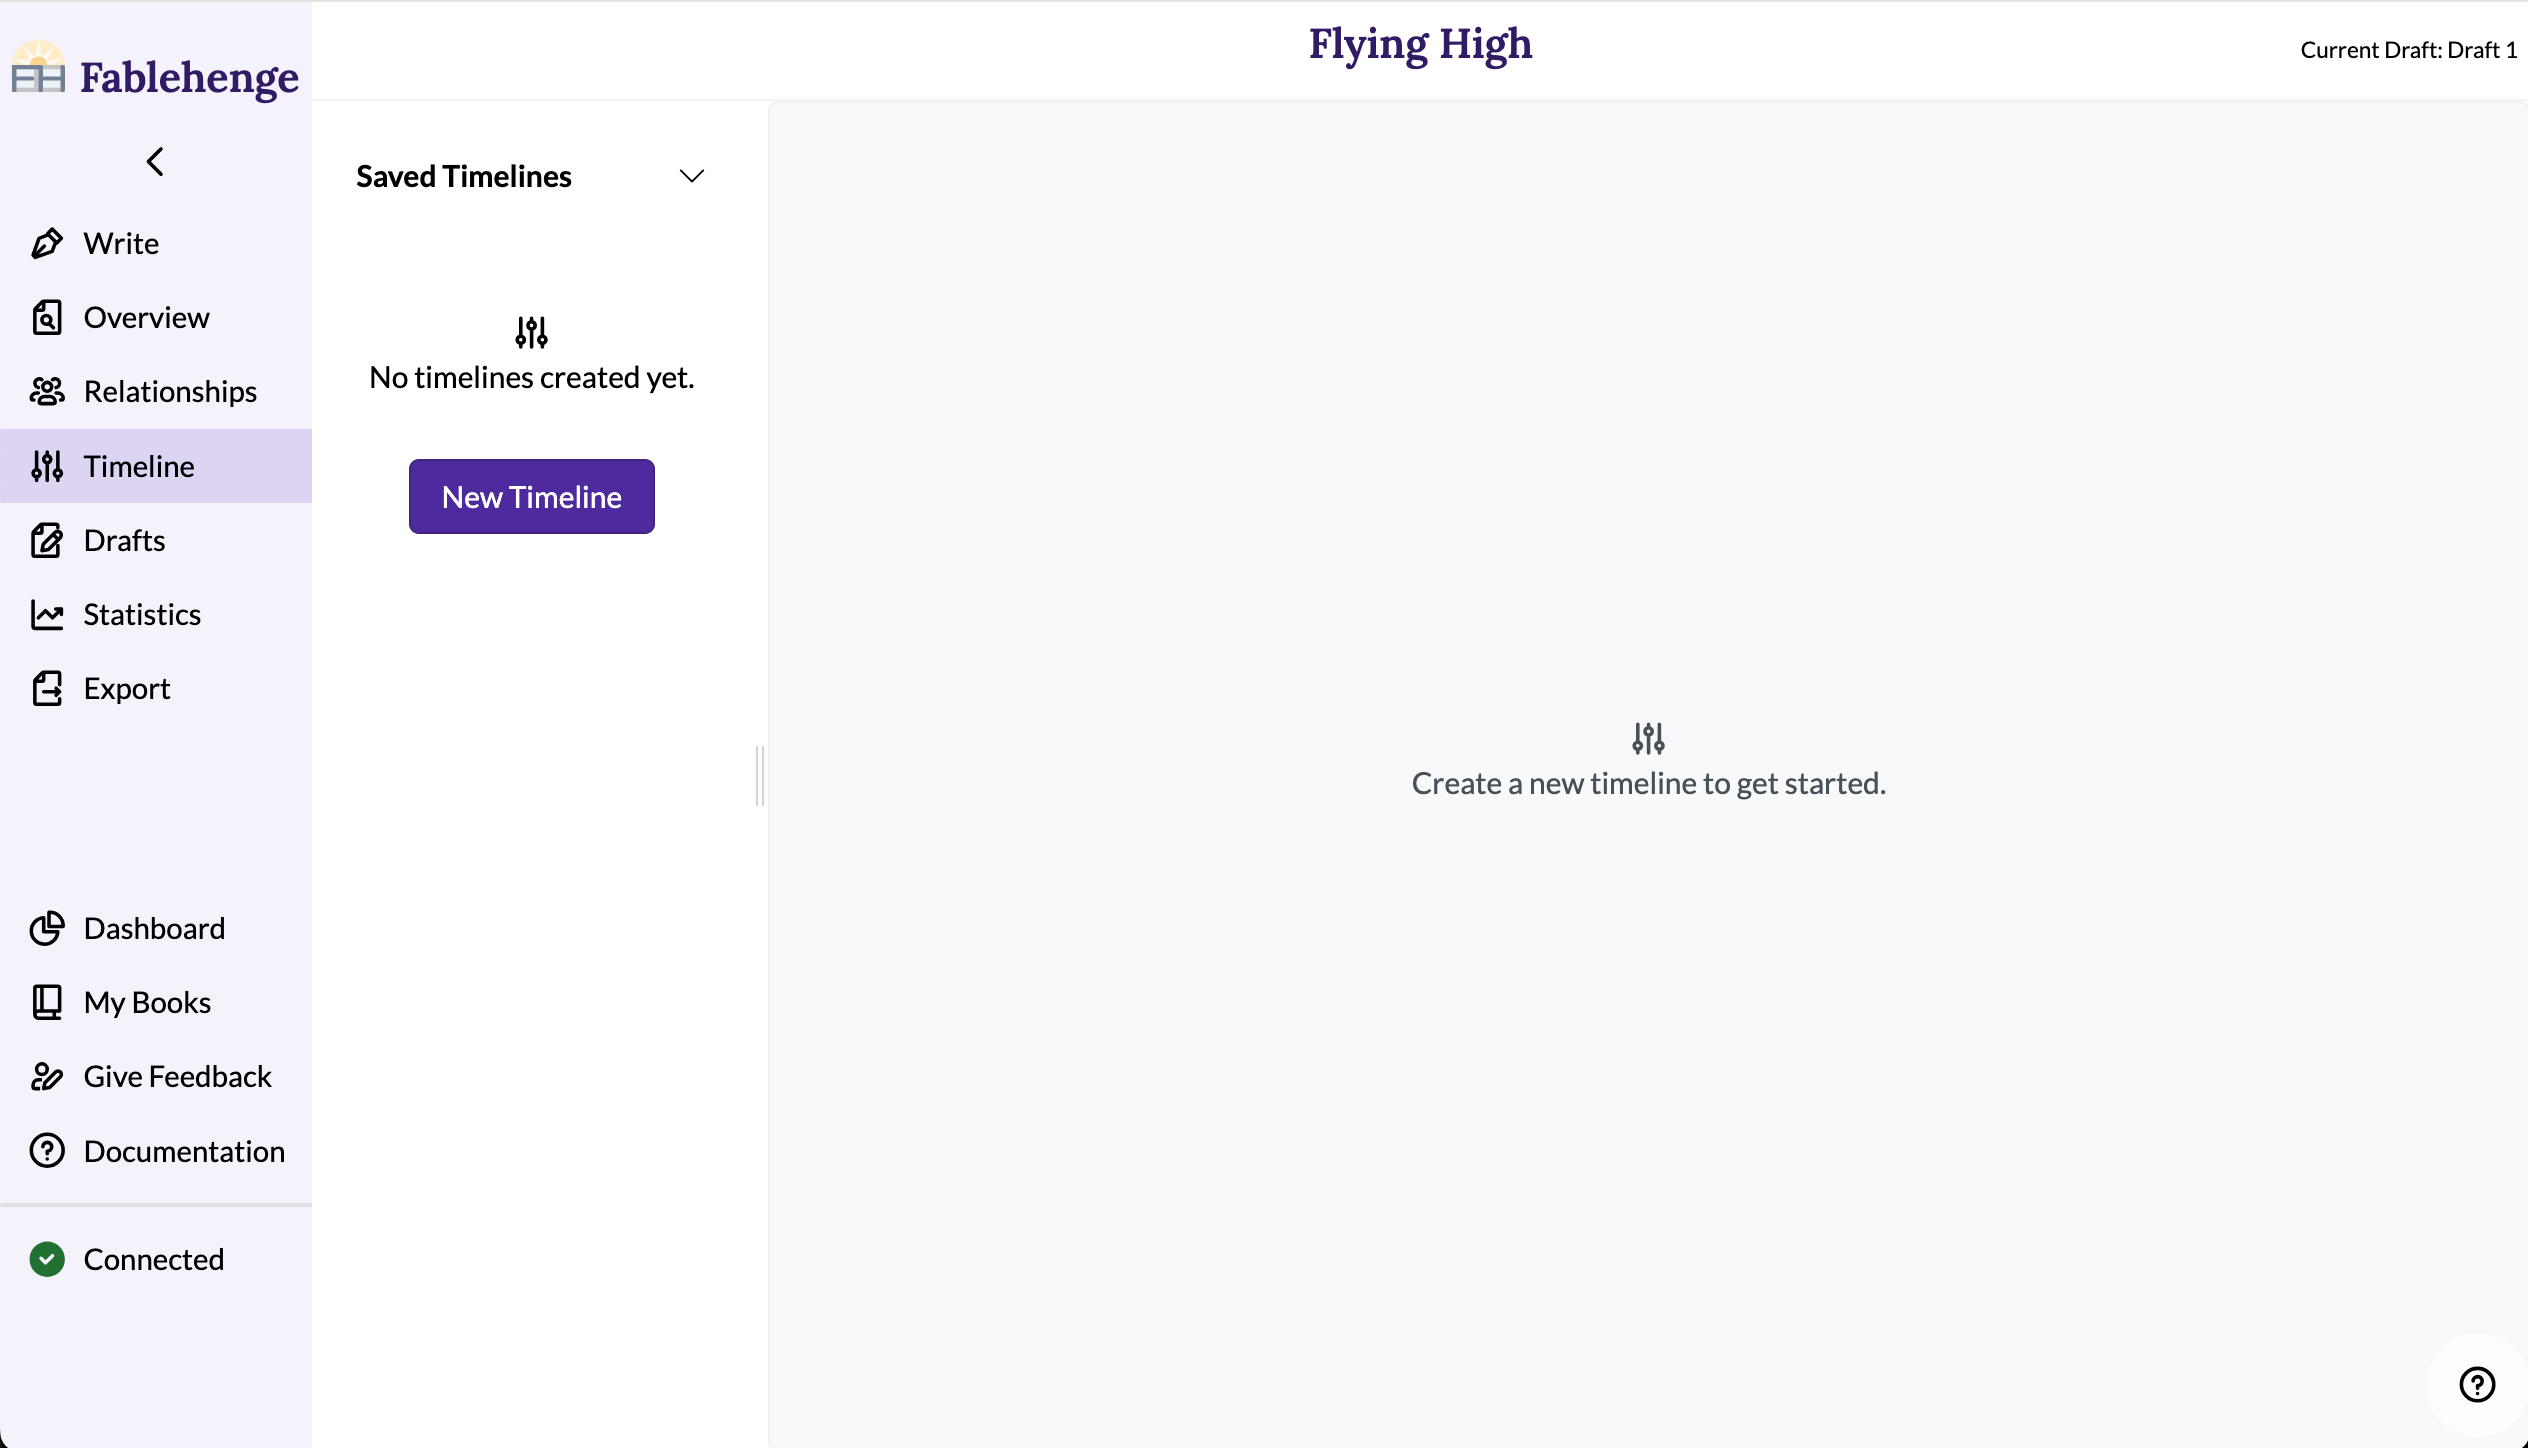
Find your timelines in the Timeline section from the side navigation bar.
Click the "New Timeline" button and enter a name for the timeline.
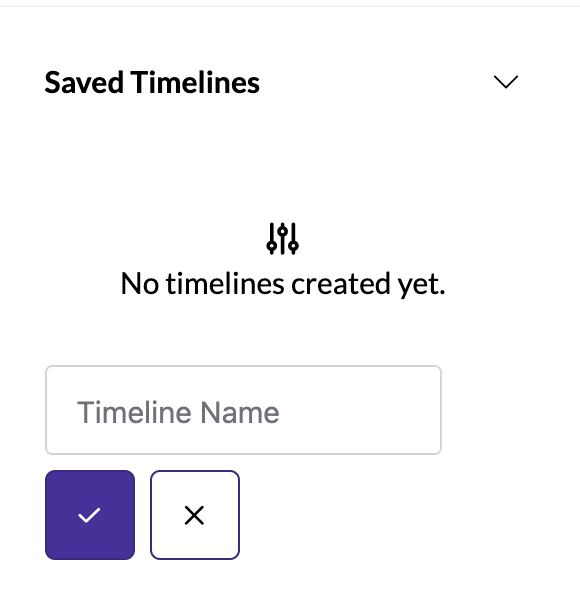
Click the check button to create the timeline.
The timeline name appears in the Saved Timelines menu, and a list of all available tags appears in the sidebar.
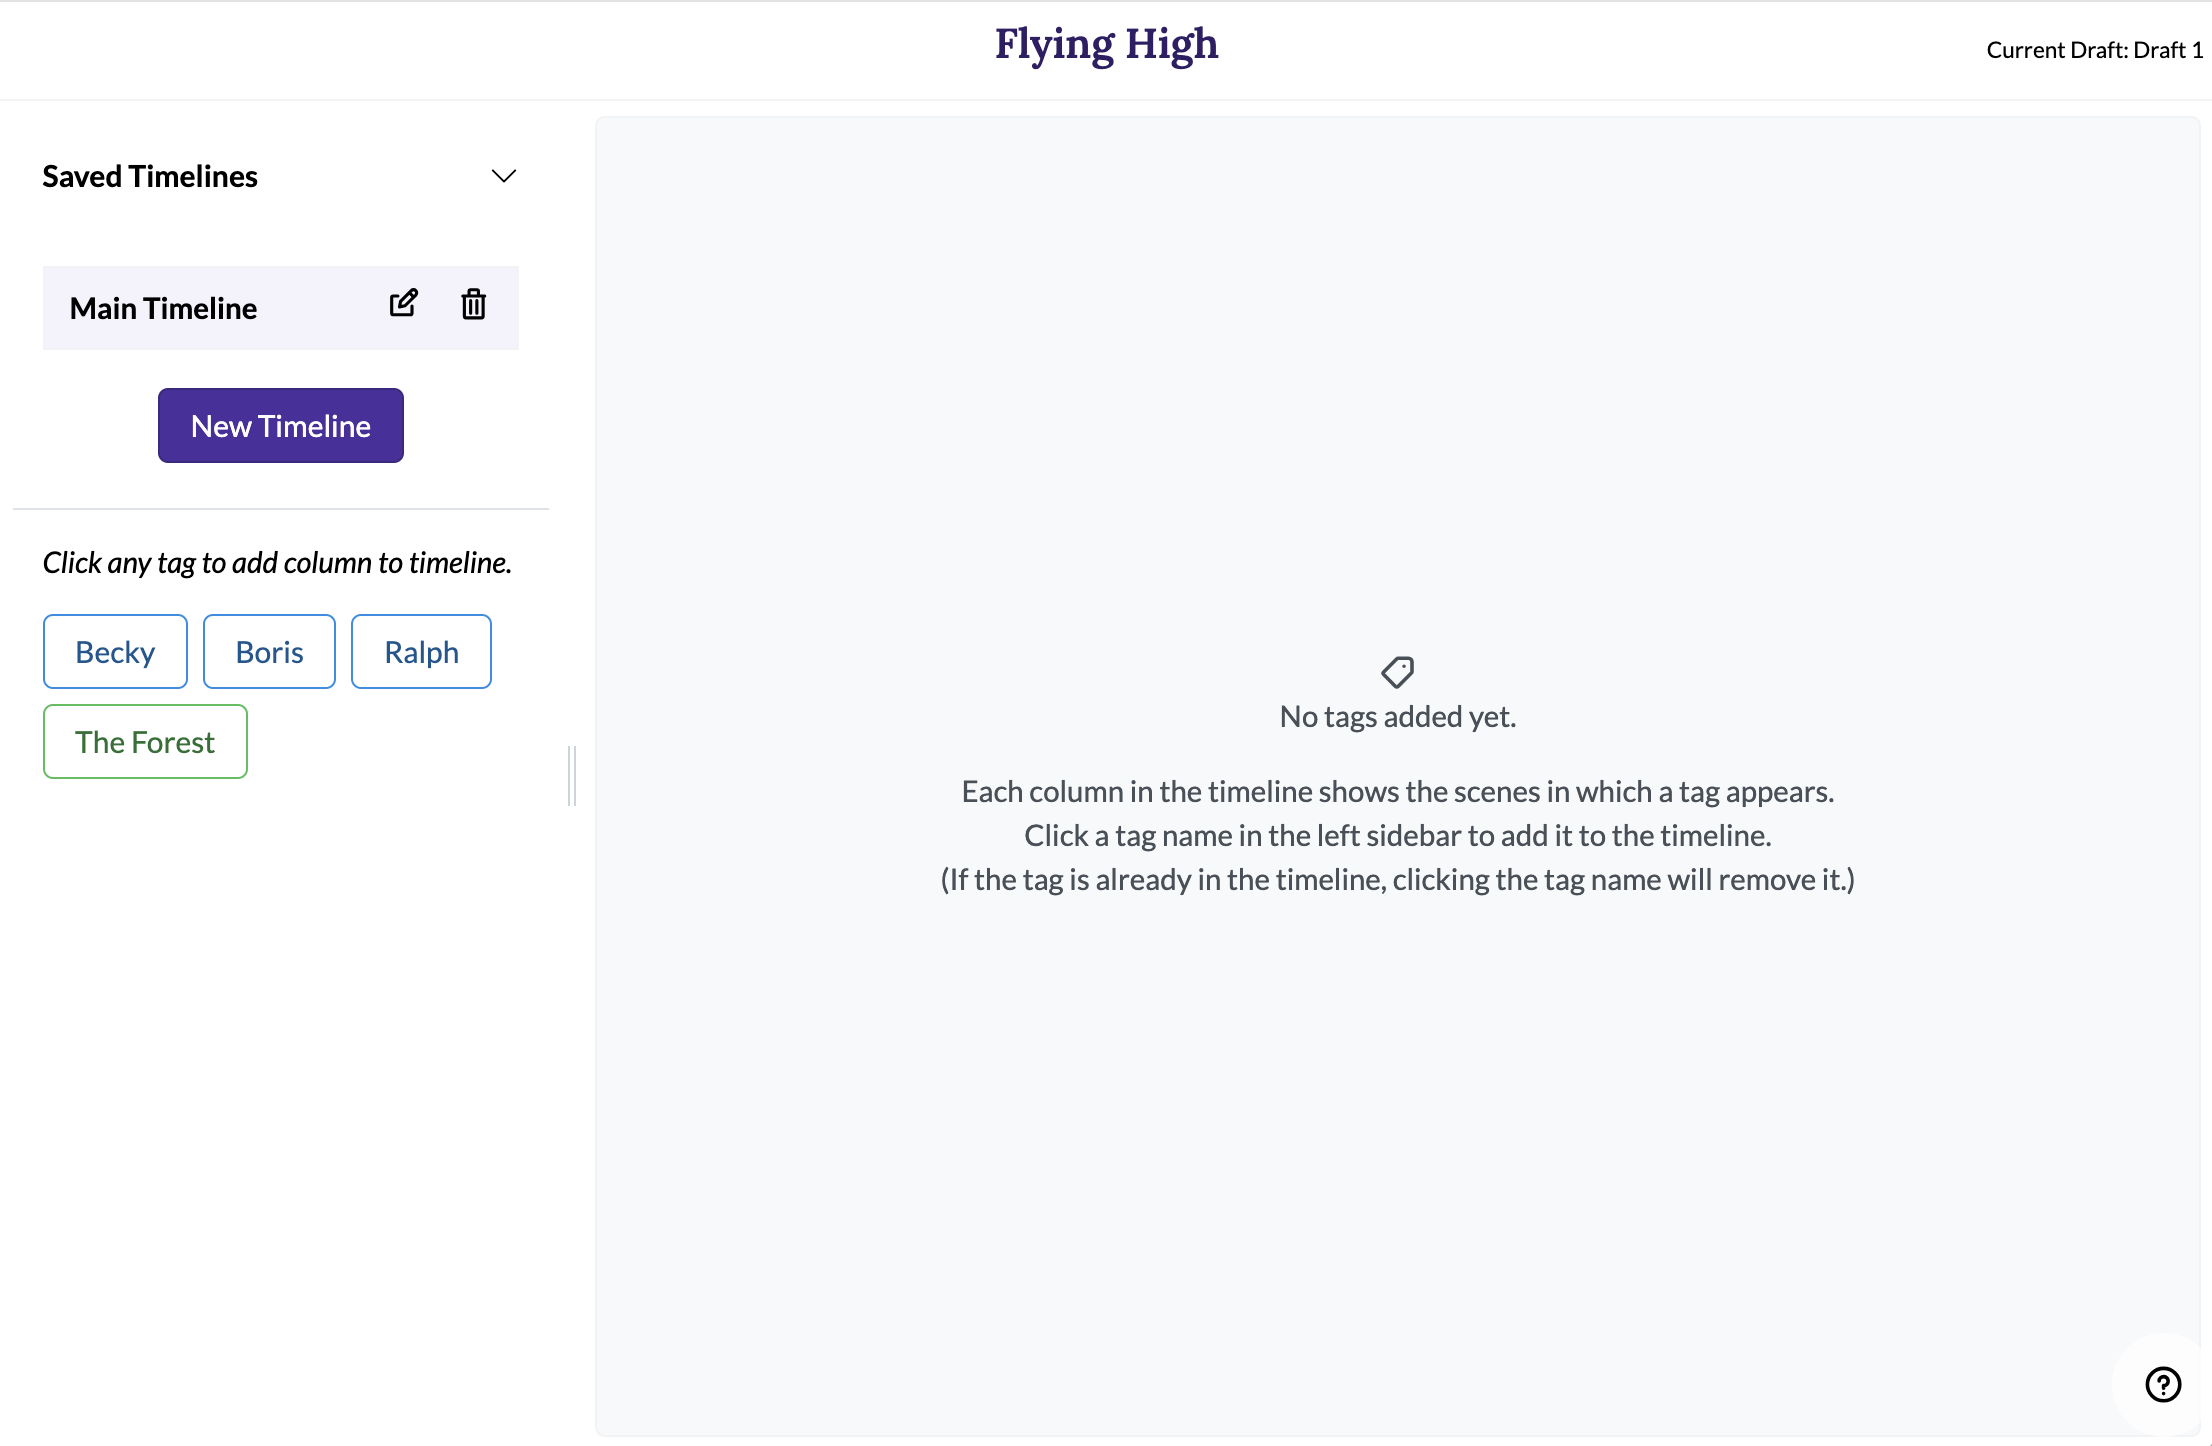
Adding tags to a timeline
Now it's time to decide which tags you want to view in this timeline. To add a tag to the timeline, click the tag name in the sidebar.
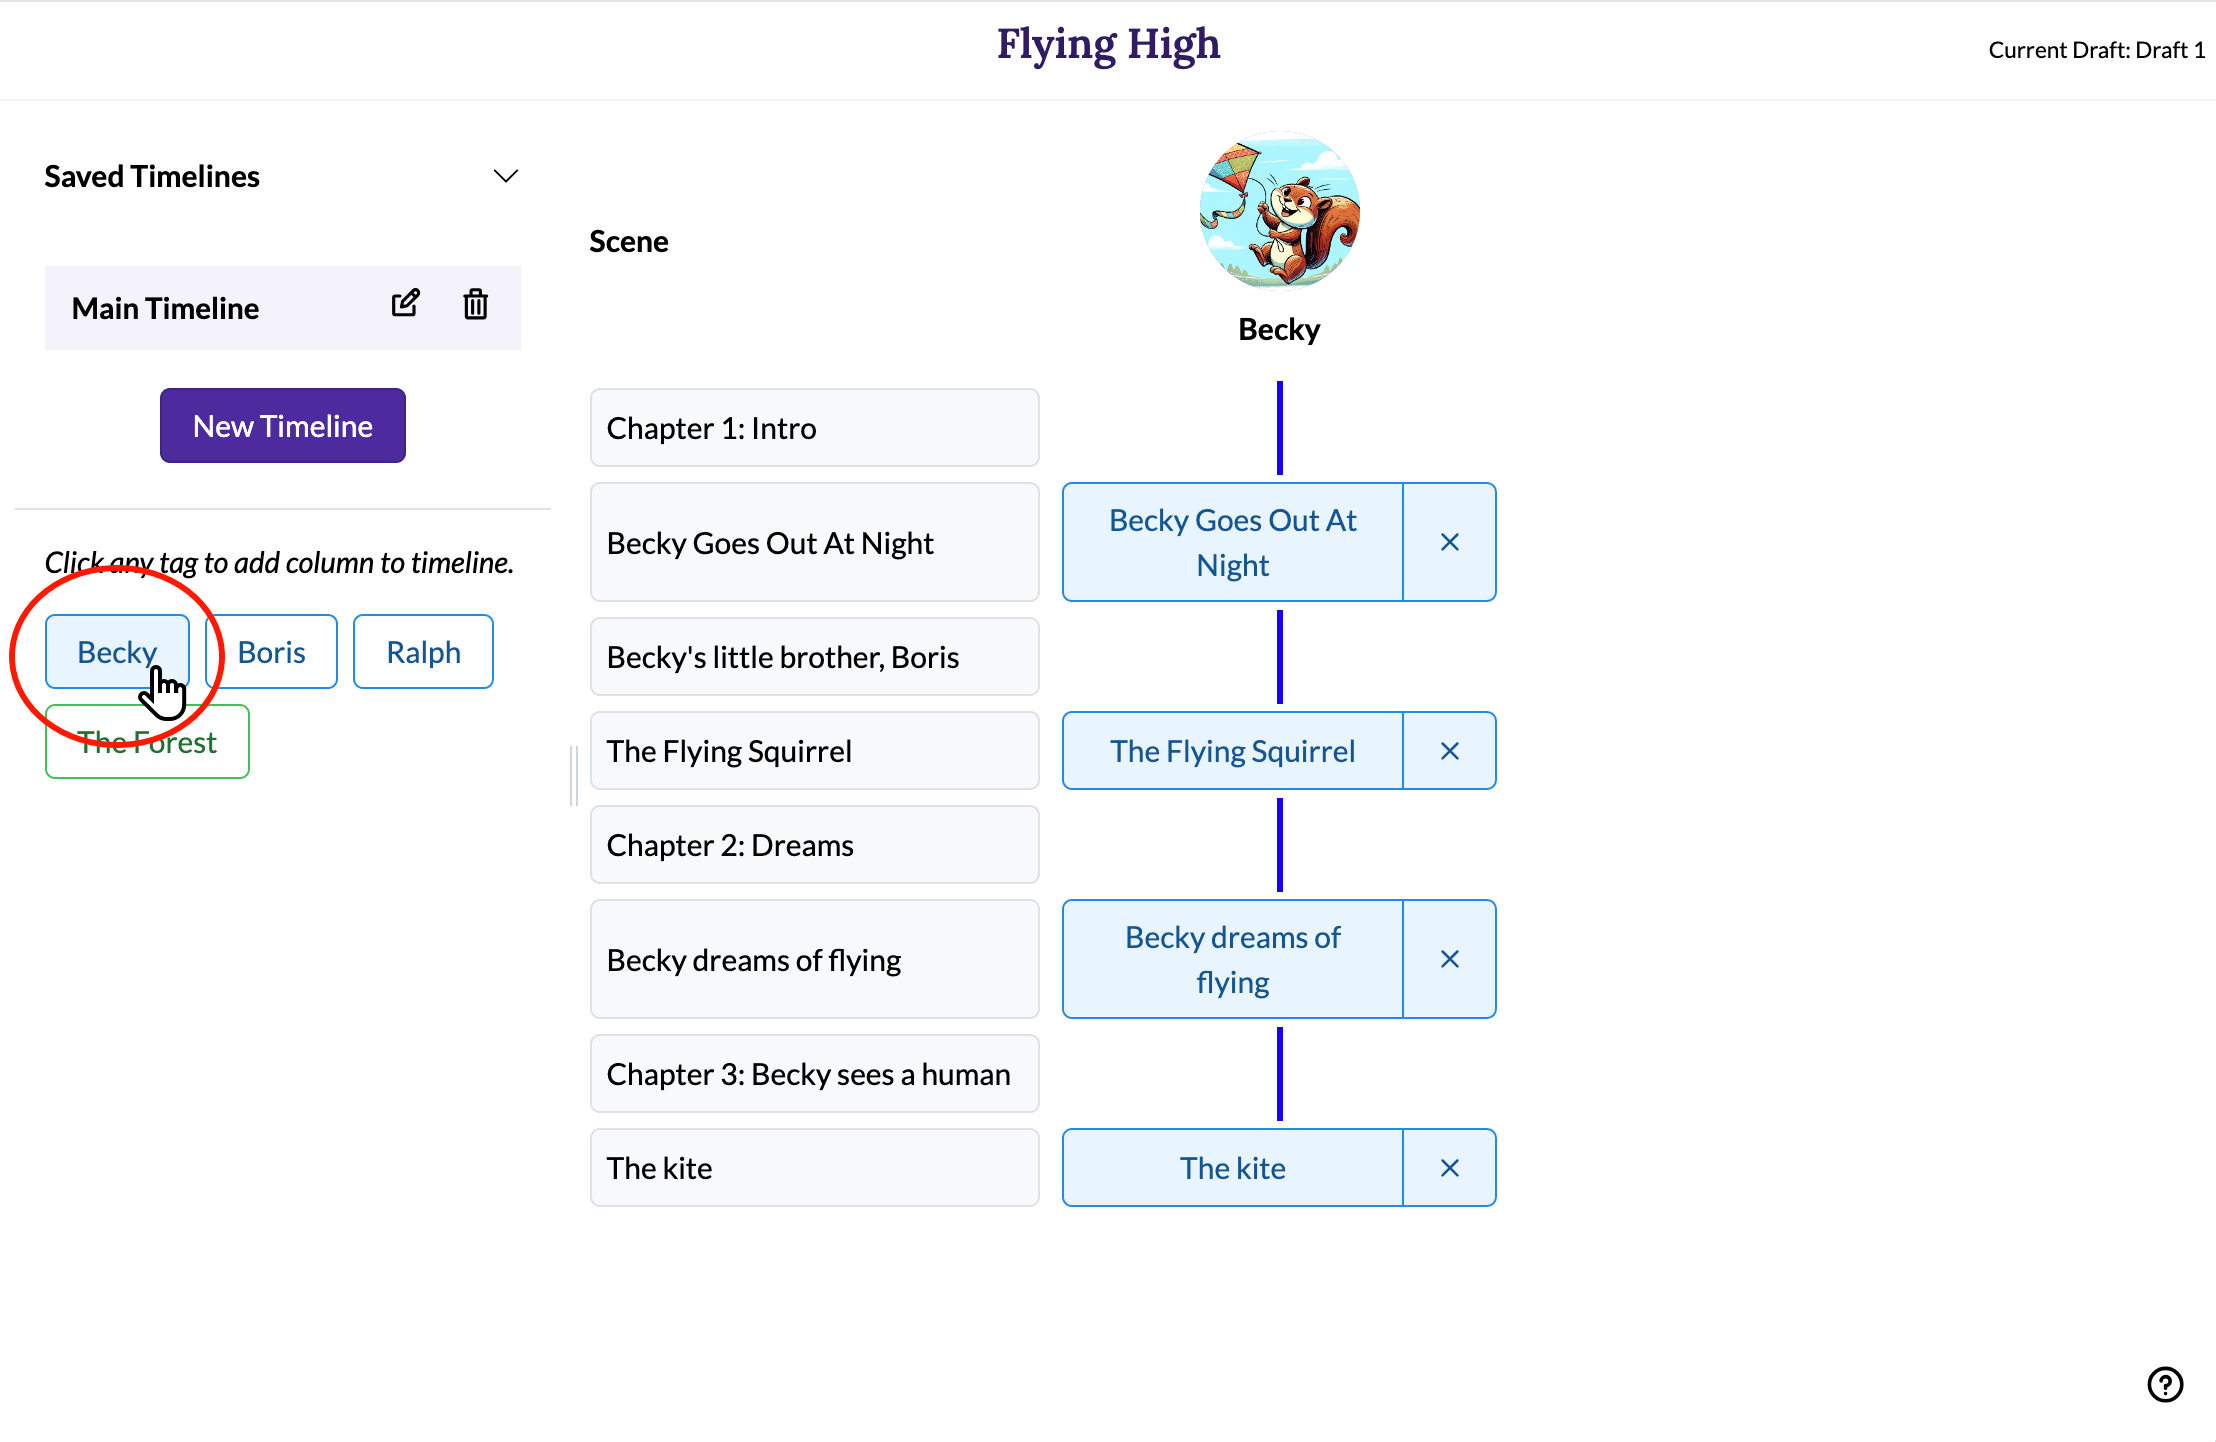
After clicking on "Becky" in the sidebar, Becky's column appears in the timeline.
The outline listing all scenes in the book appears to the left.
Because Becky was already tagged in four scenes, those four scenes are visible in Becky's timeline column.
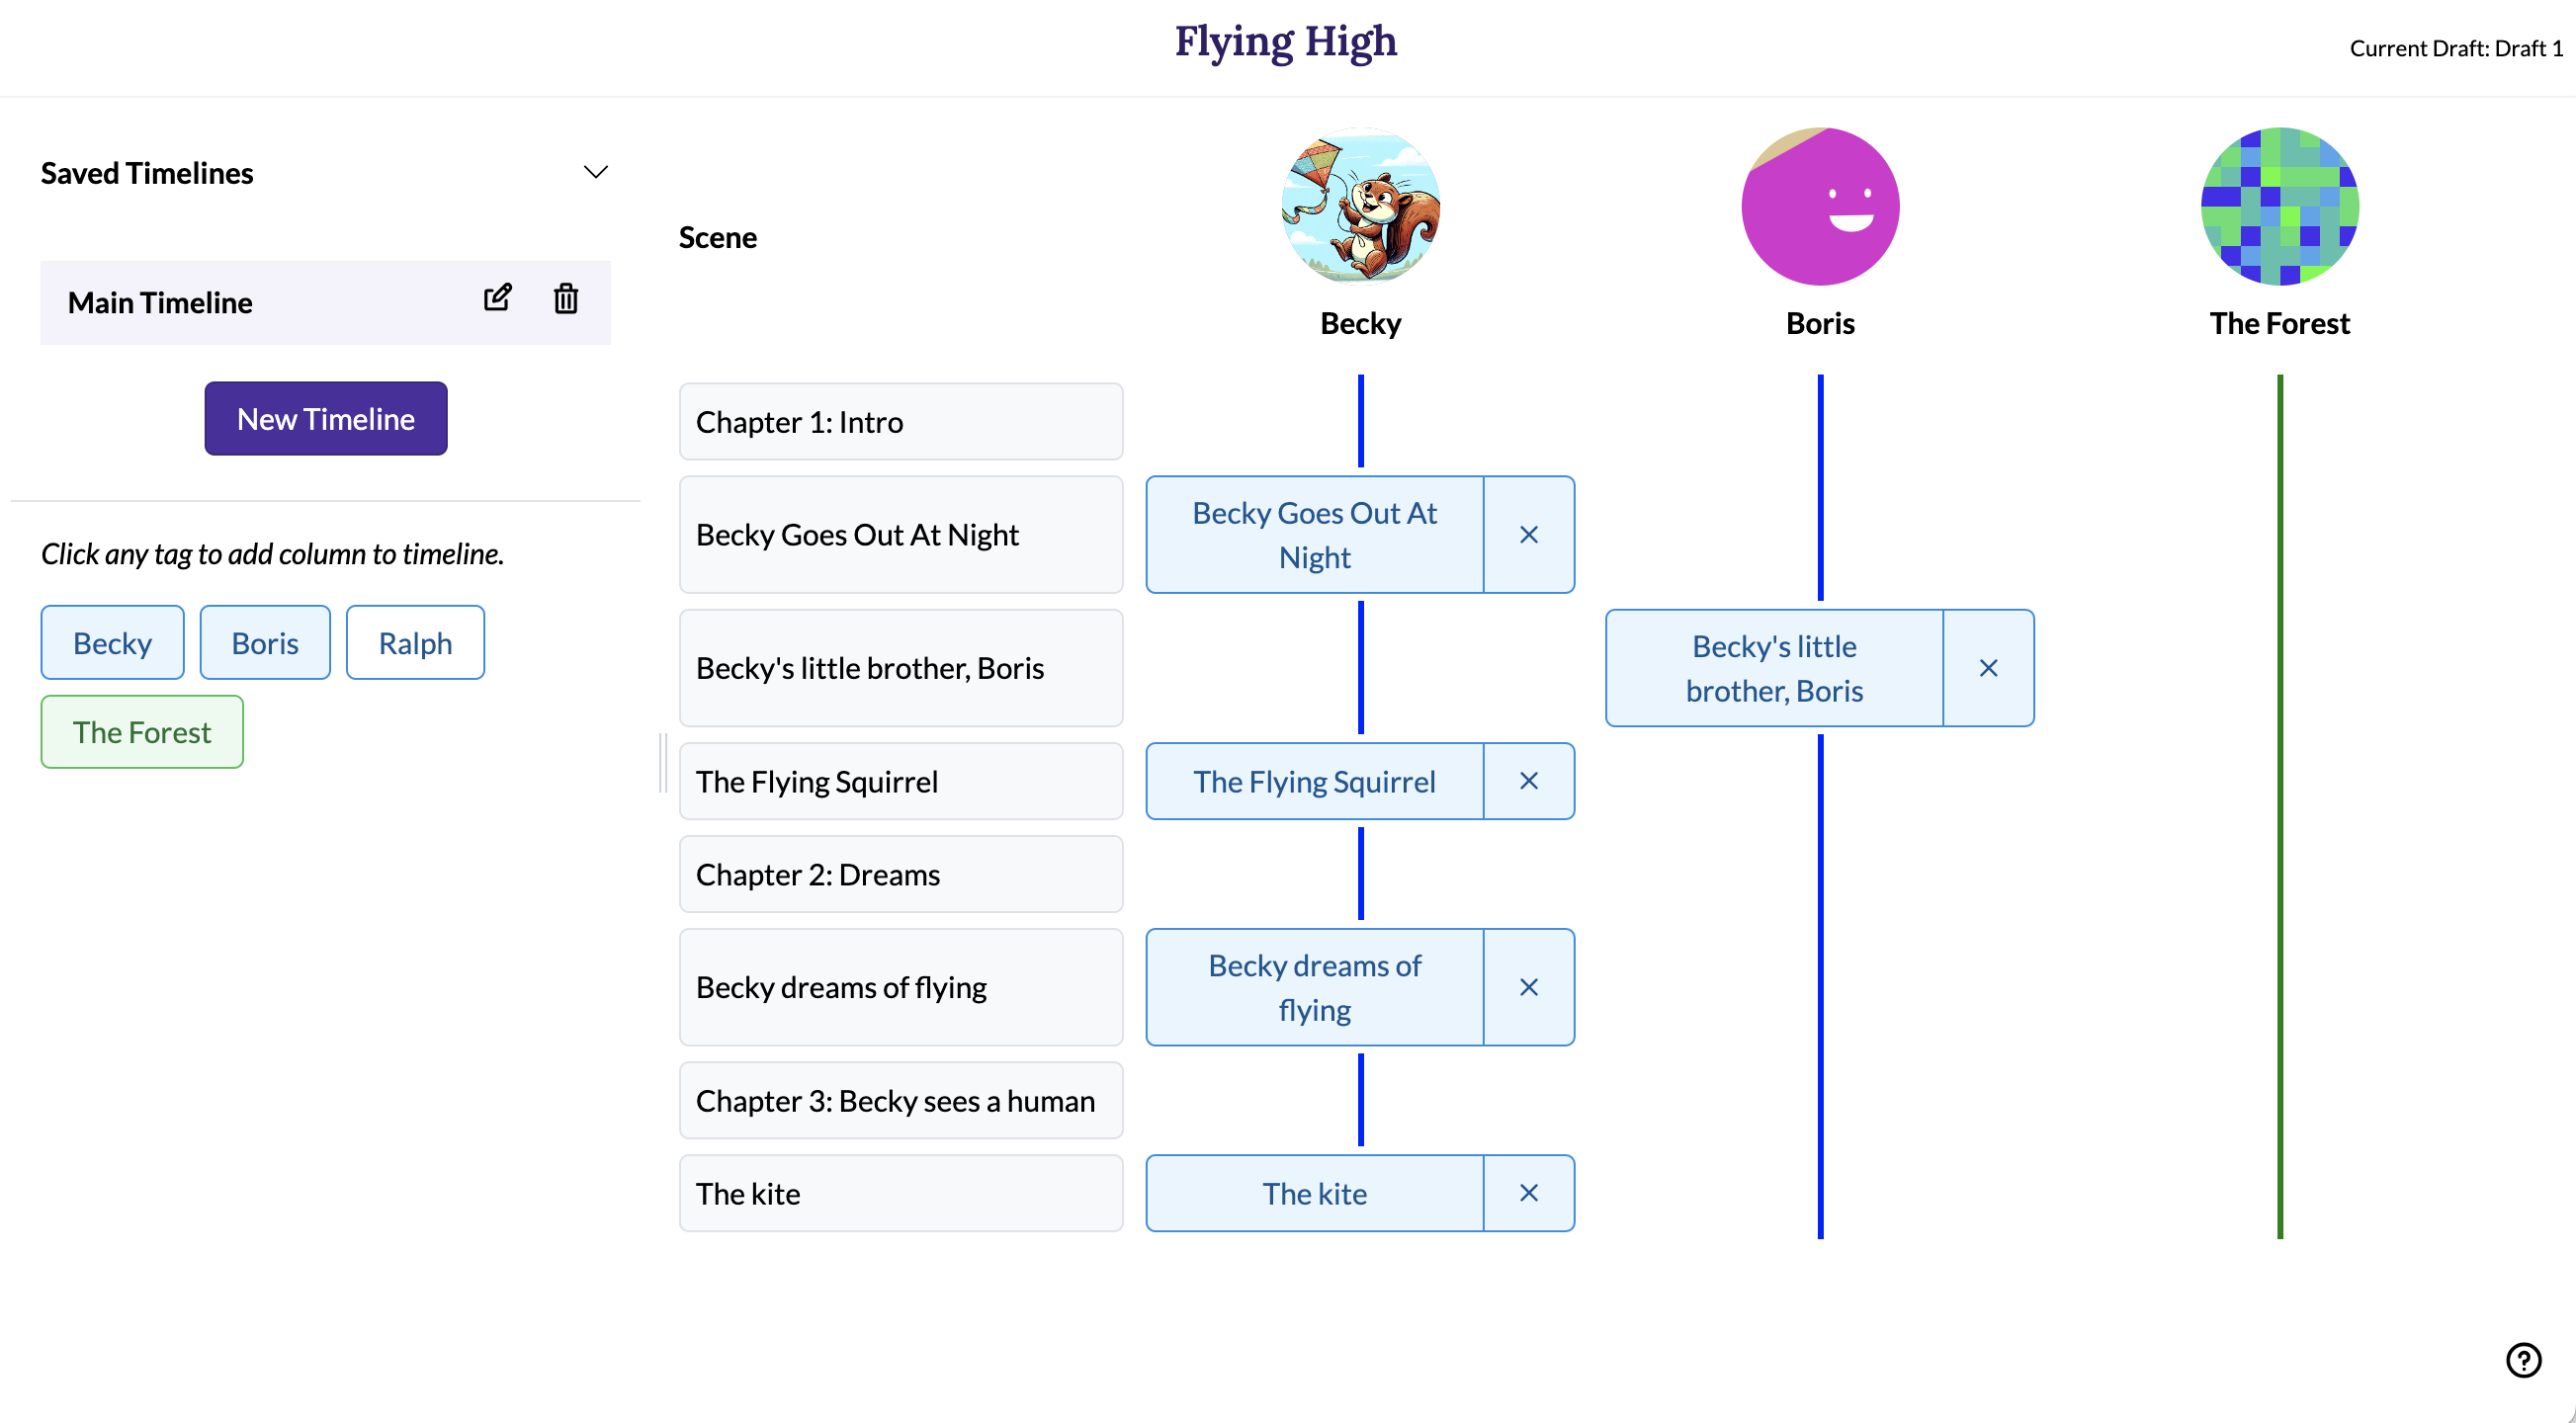
Click more tags to add more columns to the timeline.
Adding tags to scenes
Timelines are integrated with your manuscript. The timeline will automatically reflect any tags you've already added while writing, and you also can add tags to scenes directly from the timeline.
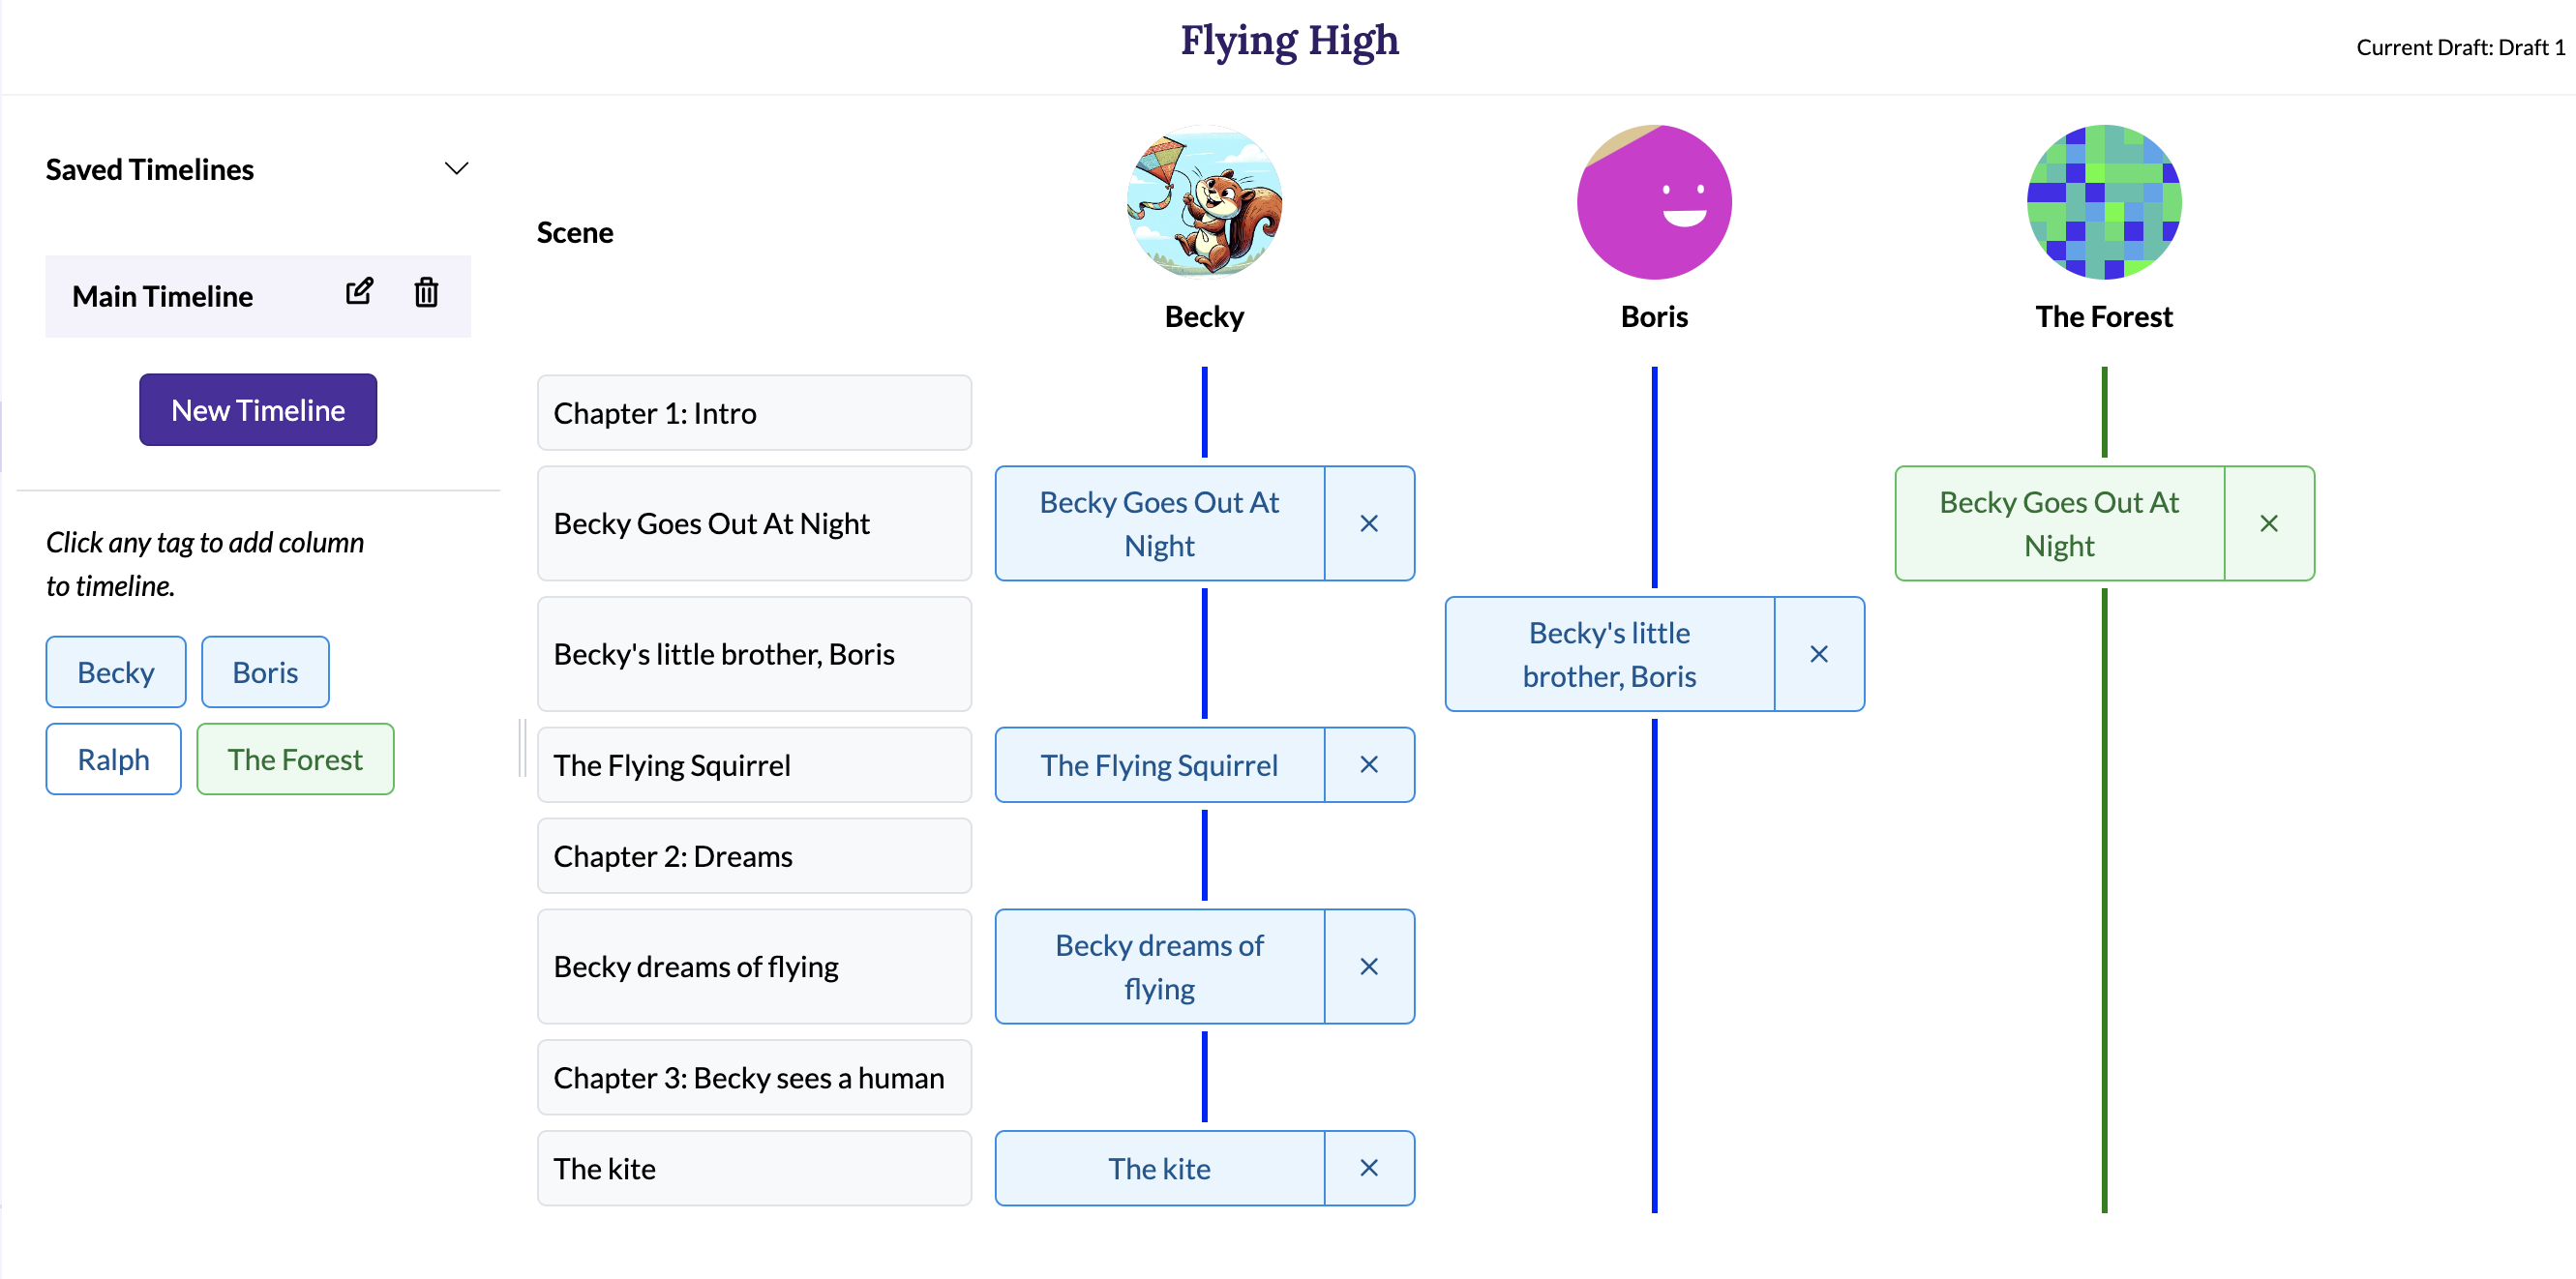
To add The Forest to the scene Becky Goes Out At Night, click on the cell at the intersection of the tag and scene.
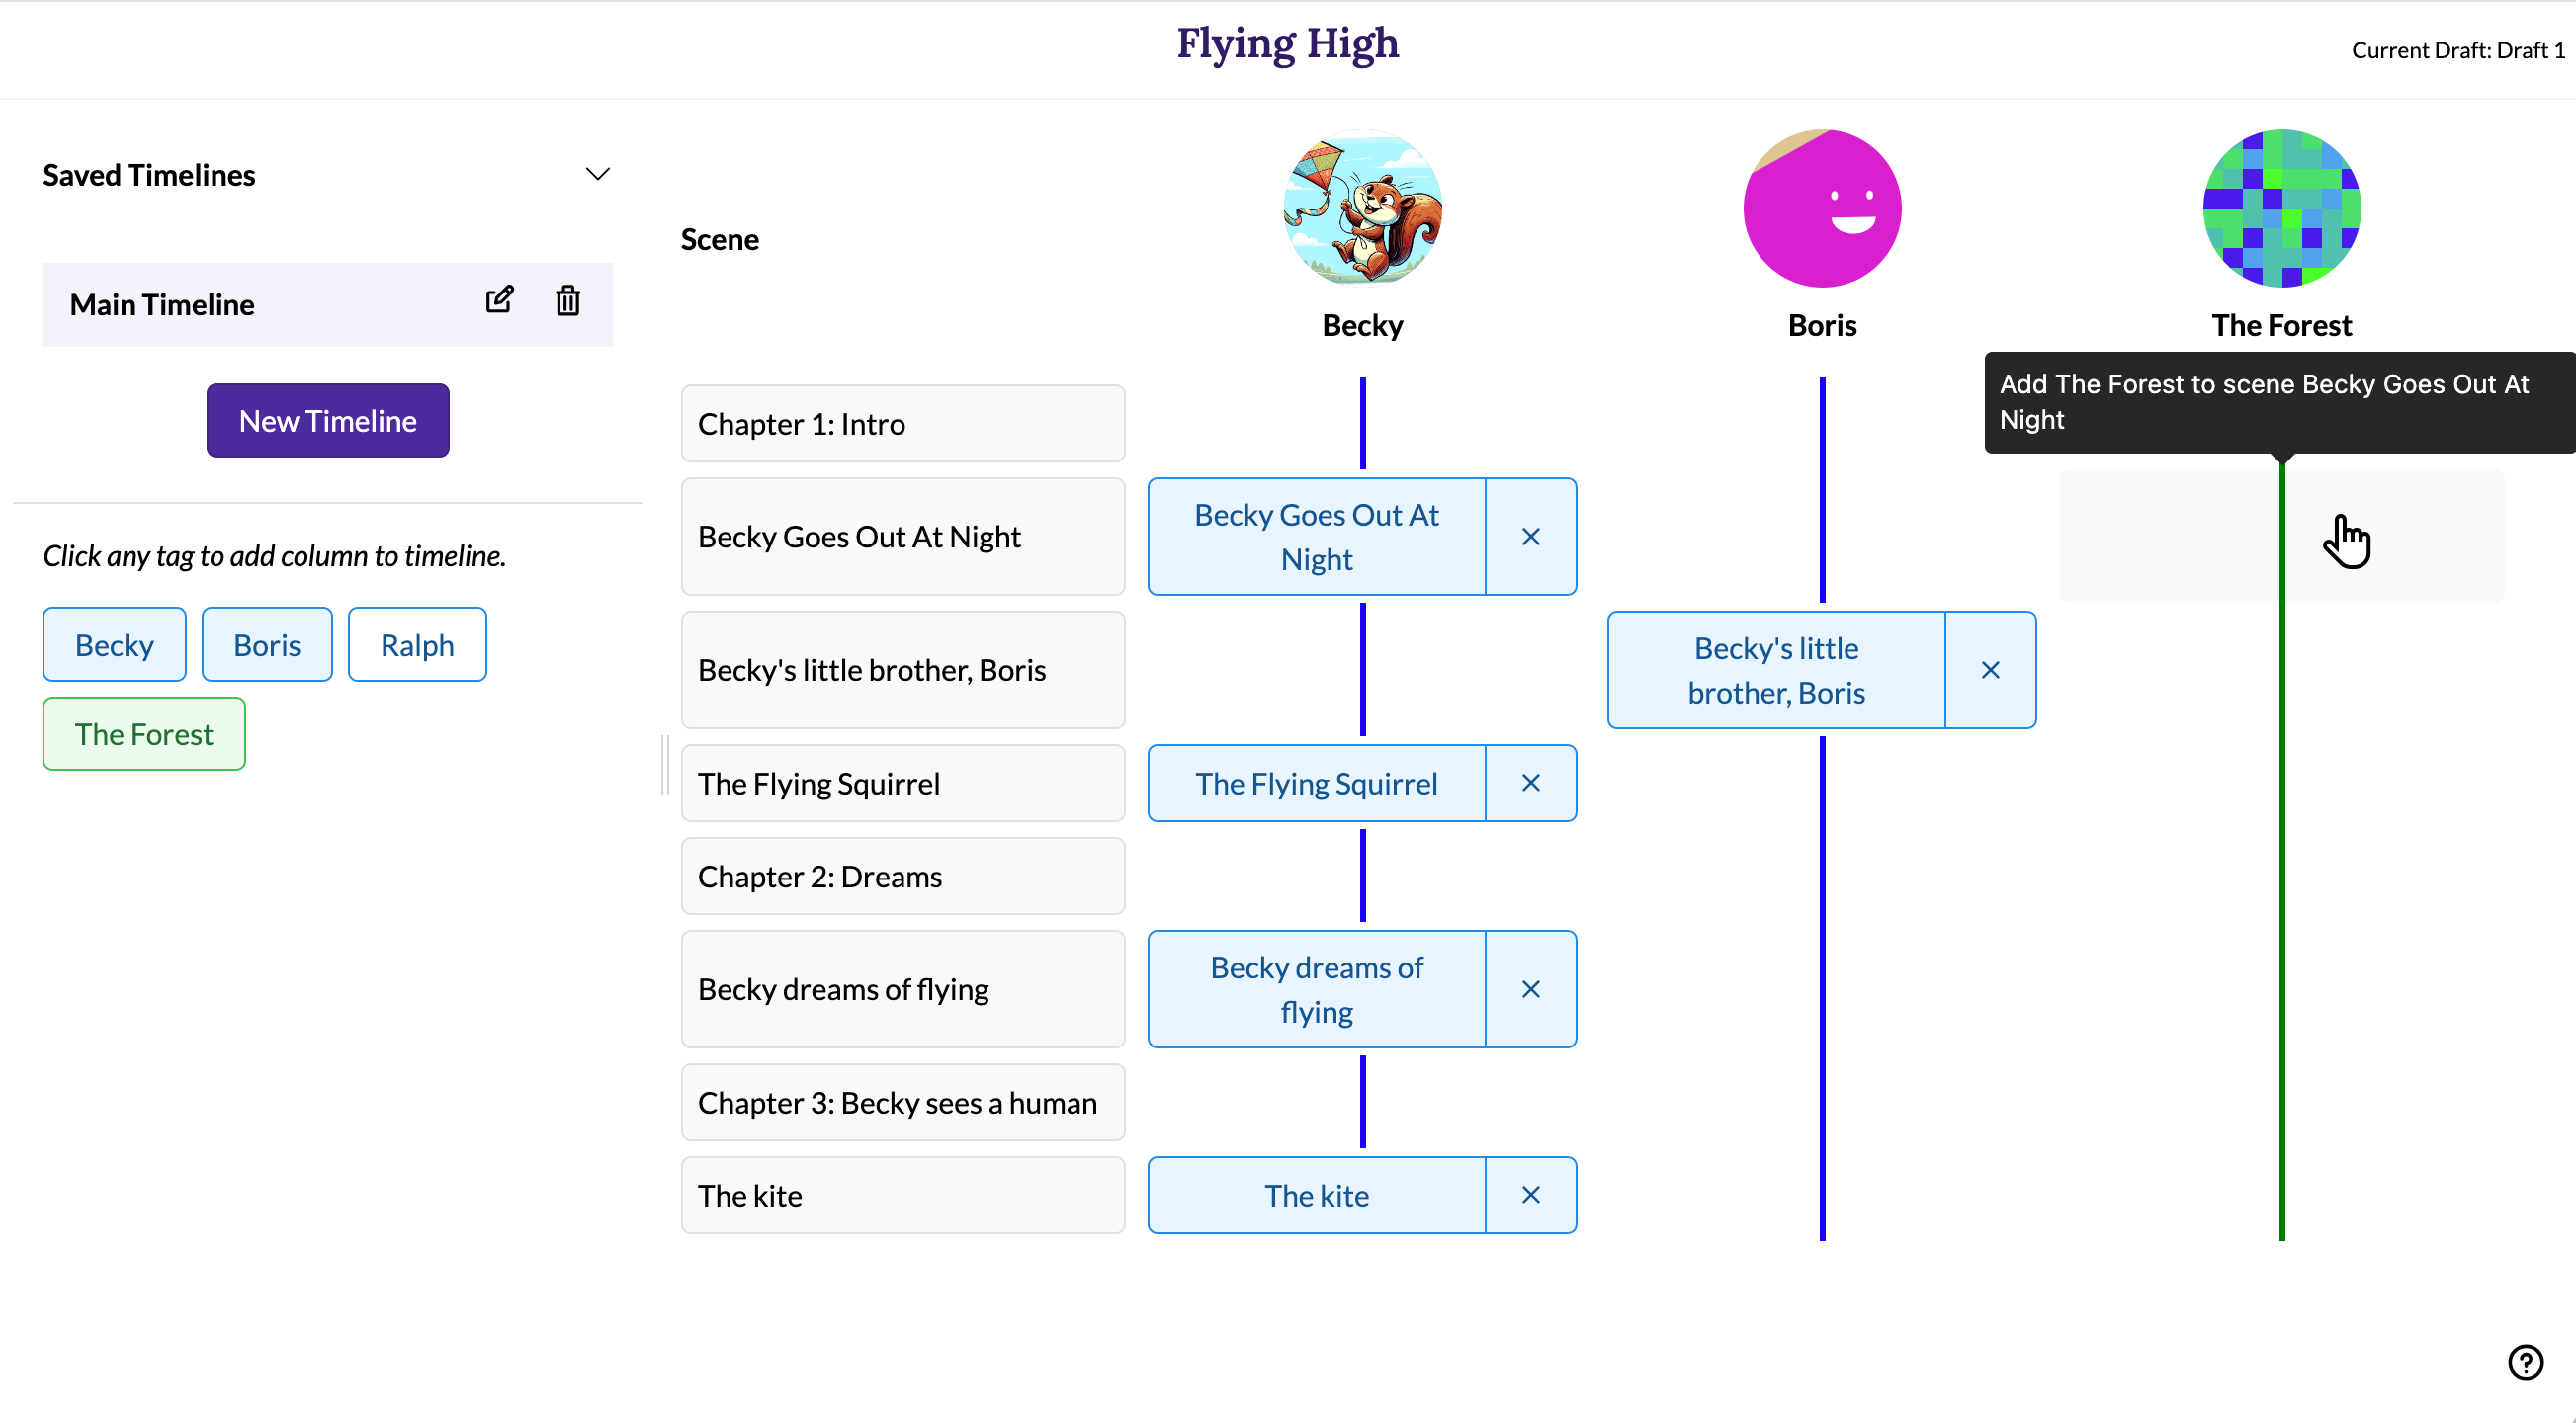
Clicking adds the tag to the scene, and the scene title now appears in The Forest's timeline.

Note: Each timeline column's colour corresponds to the tag category. In this case, Becky and Boris are characters (blue), and The Forest is a setting (green).
If you visit the manuscript page, you'll also see here that The Forest has been added to the scene.

Removing tags from scenes
Likewise, you can remove a tag from a scene by clicking the "x" button to the right of the scene name.
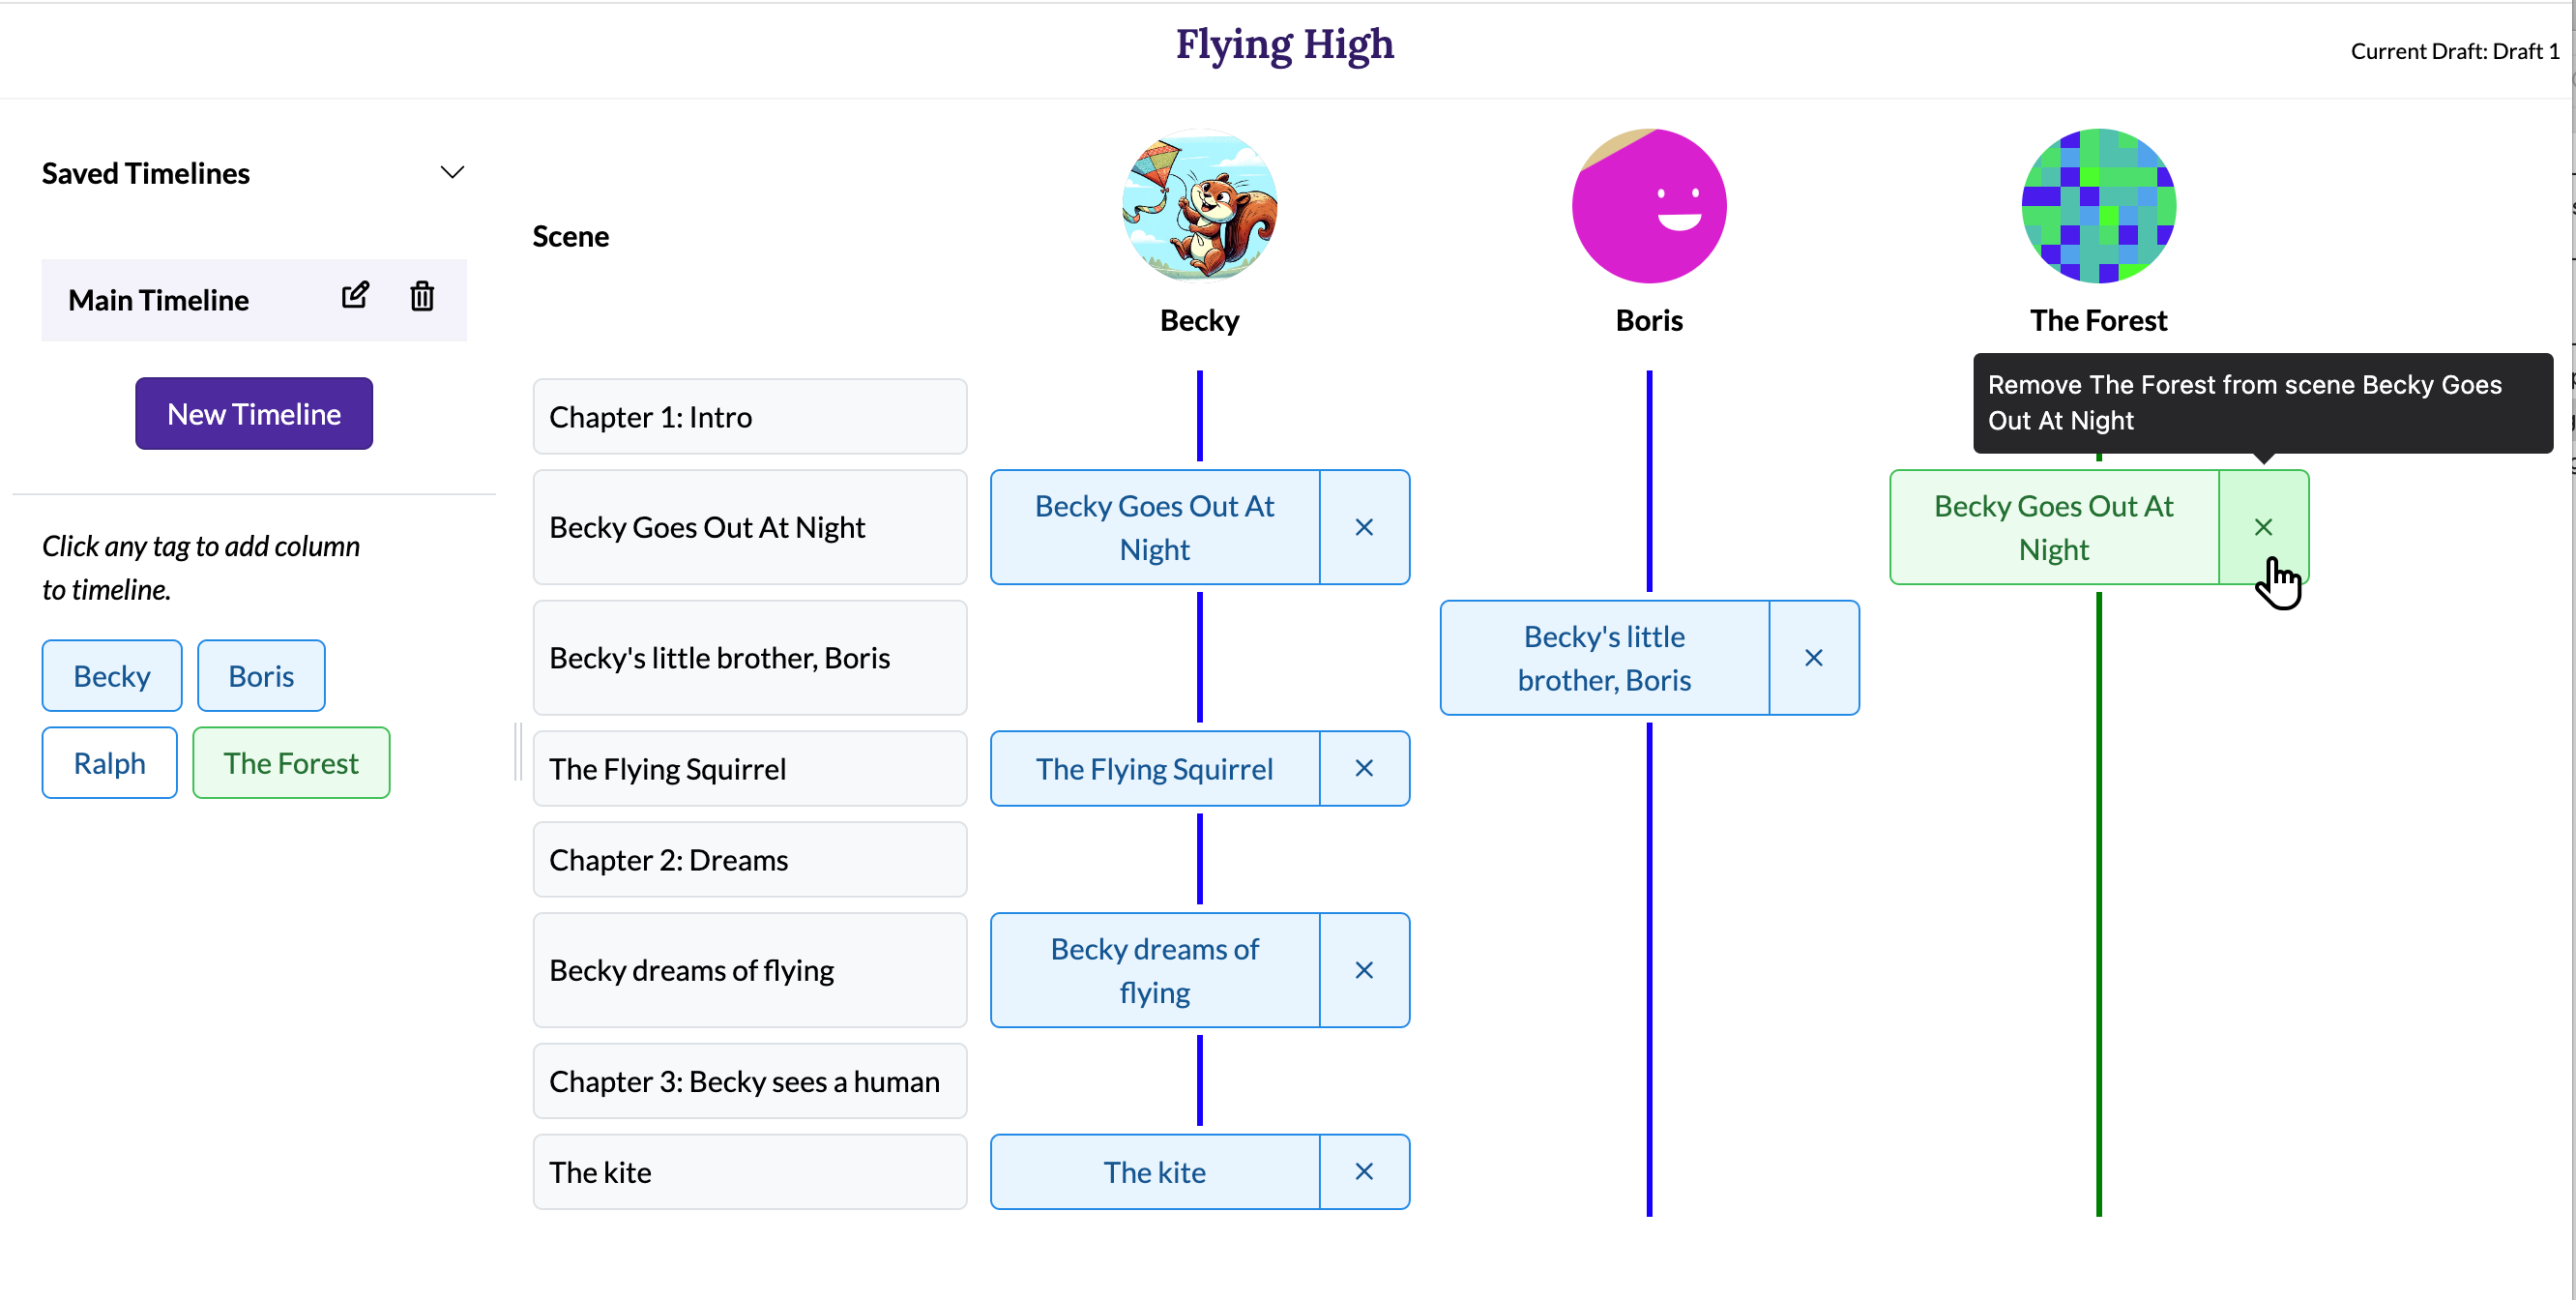
The tag will be removed from the scene, and the scene title will disappear from the tag's timeline column. If you view the scene in the writing interface, you'll also see that the tag has been removed.
Navigating to scenes from the timeline
When deciding which tags to add to scenes, you may want a quick shortcut to jump to a scene and remember what's happening in it. Click any scene title on the timeline page to go to that scene. The scene titles in the left-hand column, as well as cells in the timeline columns, are all links.